


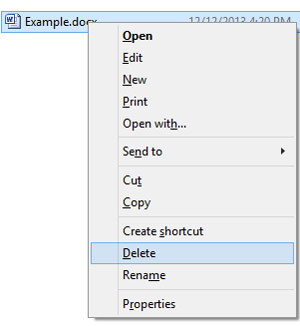
Batch files refer to tiny files that are capable of running commands from the system’s inbuilt command prompt app. In this blog, we will discuss the process of creating Batch files that can be used for deleted files on Windows. Let’s get started.
More Information : microsoft-windows


There are its features and tips which not only makes your job easy but saves a lot of time.Let us begin by talking about these tips:Collaboration MeetingsYou can conduct collaborative meetings with the people far off instead of travelling all the way to their place to talk.
The answer to your question is a person with an email account.Someone who doesn’t have the Microsoft Teams application installed can still join the meeting via browser with an email account.
The browser doesn’t give the same options as an application but it is still an excellent way to be a part of the conference.Schedule meetings from withinYou can opt to start a meeting now or schedule it for later from within the teams.
A guest must have an office 365 account for the host to add him/her to the meeting.To add them to the meeting, click the three-dotted icon in front of the group you want to add them to.
Click on the ‘Reply’ button to add to the conversation and give your suggestions.Conversation on a document – To start a previous discussion regarding a document, select and open the document.
It can be used or avoided as per your convenience.Bookmark important informationYou can save important messages with the help of the ‘Sash’ icon available on the top of each message.

Fortunately, a Windows computer doesn’t get slow with time.
If your computer did slow down, then there can be some reasons behind it.
In this blog, we will go through the various solutions to speed up your Windows PC.
Let’s get started.Source : http://macfeemcafee.com/how-to-speed-up-a-slow-windows-78-or-10-pc-for-free/

Creating a backup file of USB drive may help you to take a copy or clone of your important documents.
You can duplicate the data to other drives or systems as it will help you in case you lost your USB drive or contents stored in USB.Here is how to take an image copy of the USB drive on Windows 10.First of all, you need the “partition tables” and drive’s master booting record to take a full backup of your drive’s data.
In this case, it is recommended to create a clone of your USB drive in case there are multiple partitions.If you are creating your drive’s clone, then the upcoming or resulting clone image will present, including all the hidden and visible files with unused drive space.
It will show the free space of your drive on Windows 10 that covers a single file.In case you wish to copy multiple files from an unbootable USB drive to various other units as per their storage capacities, then Cloning is one of the easy and quick solutions.1.
Cloning USB DriveFor copying the USB drive, you can use one of the most recommended tools provided by Passmark Software: “ImageUSB.” The main issue of this tool: it doesn’t download on Windows 10.
For getting this tool on your system, follow the under mentioned steps:First of all, you have to unzip the file in a specific location.Then, connect the USB stick and then try to open the program by navigating the file “ImageUSB.exe.”Then you have to double click the file extension path.Now, in case you see the pop-out “User Account Control,” then hit the “Yes” option.Once the function or program launches on your system’s screen, then tap on the box located just after the listed “USB” gadget.After that, you have to tap on “Create Image From USB Drive” option.Then, hit on the “Browse” tab to create a particular location for your saved image.Note: You may be required to make a file name, but you can’t modify your “.BIN” file extension.After that, tap on the “Create” tab when you have selected the location and file name to begin your picture saving procedure.At last, hit on “Yes” appears via a pop-out window to authenticate the details.Navigate to the section “Available Options” located at the right-hand side portion of your page.Now, you will see that the option regarding “Post Image Verification” is marked.