


If you use any Mac or iOS device, then you would have surely used the Keychain Passwords feature.
It is a little similar to Google Chrome’s automatic log-in option.
The difference is that it has a cross-platform application that synchronizes the passwords as well as sign-in information between the iOS and macOS gadgets.
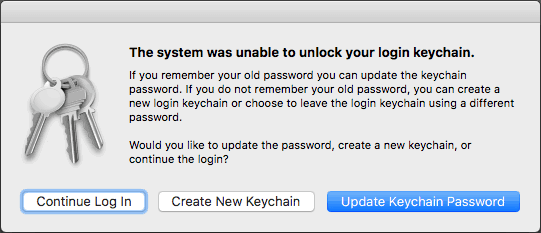
You shall be able to view the list of the passwords in Keychain whenever you would like to see.
The method of using Keychain on macOS
For having access to the list of Keychain passwords on a macOS system, you only need to use Spotlight to find the app and view your passwords.


The Home app on your Apple device helps in doing several tasks on your fingertips.. From turning on lights to adjusting the thermostat, you can finish up innumerable tasks with the help of the Home app on your Apple device.
If it’s the scenario with you too, then you can go through the detailed methods I have mentioned in this article to set up and use the Home app on your Apple device.
Here’s how to get started with the process
To get started with the setting up and using the Home app on your Apple device, follow the steps listed below:
At first, update your iPhone, iPad, and iPod touch to its latest version.
You have to check if you have one or more than one product that supports AirPlay 2 or Homekit.

The web is filled with numerous sources and platforms that allow users to buy stuff online conveniently.
Apple Pay is one of the best options available on Apple devices you can use to make a secure payment online.
In case, you find it hard to set up and use Apple Pay on your device, then here are some methods that will help you out of the hard part.
So, here’s how you can manage and set up Apple Pay along with your Wallet.Simple Steps to Set up Apple Pay on the MacThere is no need to worry even if you have an iPhone, Mac, Apple Watch, new MacBook Air, or MacBook Pro with Touch ID as Apple Pay is supported on every Apple device.
So, here is how you can manage Apple Pay and your wallet.Launch the Safari app on your preferred device.Go to the Preferences.Tap on the Privacy tab.Click to select the checkbox available next to Apple.It will allow websites to prompt users with the payment section.Set up Apple Pay on a MacBook Pro or MacBook Air with Touch Bar MacBook Pro or MacBook Air comes with a touch bar that allows users to authorize payment from the keyboard directly.
Here’s how you can do it.Go to System Preferences.Tap on the Wallet & Apple Pay icon.Select the Add Card option to add a new debit or credit card.Enter the card’s information manually.Tap on the Next button to verify the card number.Now, type the card’s CVV security code and the expiration date.Press Next.Hit “I Agree” to accept terms and conditions.Select a method to verify the card details.Press Next.Enter the verification code sent to you accordingly.Tap Next.Setting Up Apple Pay on an older MacIn case you are using an older Mac and facing problems in setting up Apple Pay.

There are numerous handy functions available in the 2011 version of Windows Live Mail.
One such feature is the availability of sending multiple emails at once.
However, the function was unfortunately unavailable in the 2012 client.
If you wish to use the feature, then read through the blog.
So, here are the steps to send multiple email on Windows Live Mail.Sources :- How to Send Multiple Emails on Windows Live Mail 2012?
, McAfee.com/activateMake a Group of ContactsIn case the user wishes to make a group of contacts, then they can pursue the mentioned instructions.Go to the Windows Live Mail client and start it on your system.After that, select the Address book button on the lower left-hand side of the display.Also, you should hold the Ctrl + 3 keys altogether on your system to reach the Address book button.Hold the category button from the ribbon at the upper side of the screen.Navigate to the ‘Create a new category’ screen, input the name of the group in the text section.You should move down to the list of alphabetic of the email contacts.Choose all email contacts you would like to add to the group.Now, select the Save option at the bottom of the screen to store the group contacts.Use Group Contacts to Send Multiple EmailsIn case the user wants to use group contacts to send multiple emails, then abide by the provided steps.Navigate to the Windows Live Mail and begin it.You should select the Email message icon on the top left-hand side of the screen.Go to the ‘To:’ option.