


Regardless of whether you're enhancing your portfolio, refining a customer project, or adorning your web composition, digital illustration considers numerous inventive methods, each with unique outputs. Key tools, procedures, and console easy routes can help during the time spent making digital artwork and accelerate your work process, a particularly important tool while working as an artist.
Whether you're an independent digital artist or a drawing tablet ace, you will undoubtedly find value in this comprehensive aide for digital illustrations. So let's get to it.
There are many styles when it comes to digital art, yet it can be divided into two major types of digital illustrations. The first is a vector illustration, and the second is a pixel-based illustration.
Vector illustration: Using Adobe Illustrator
01. Pen Tool illustration
The Pen Tool takes into consideration exact outcomes with just even a mouse. It's helpful for precisely following photos or different assets. This results in an unending assortment of lines and shapes, either geometrical or thrilling and angled. The anchors can be controlled and moved around by hauling the handles joined on your digital canvas.
Some helpful details:
- For straight lines, press Shift before situating another anchor.
- To control the handles just (and not secures), select the white mouse cursor (Direct Selection Tool or An in your console) and drag the handles while pushing down the Alt key.
- Inverse handles are typically equivalent long on the off chance that you need to control each handle separately and accomplish distinctive handle lengths, press Command or Ctrl while hauling the handle.
- To erase handles, change to the Anchor Point tool by squeezing Shift + C.
02. Delineating with geometrical shapes
This style works with essential geometrical shapes like circles and squares. These can be cut and moved around unexpectedly while continually holding their straight points and amazing spans. It's utilized for different purposes, from UX illustrations to hello cards.
This strategy works best with a mix of various tools utilized to cut and associate the shapes together.
Pro tips:
- Shapes are surrounding you: Everything can be separated into basic shapes. This speedy exercise can assist you with getting to know the idea:: Find an image of your number one creature and split it up into its essential shapes by setting shape diagrams on top of the image. This is additionally a helpful technique for utilizing your artistic muscle and defeating innovative square. Choose how you need to move toward this: are the eyes simply small circles, or would they say they are ovals with round understudies and a white flare of light?
- Fit your specialty: When your picture is streamlined down to its exposed geometrical necessities, visual concordance turns out to be much more critical. Consequently, guarantee that your shapes are impeccably adjusted before blending them. Another tip for keeping a feeling of consistency is to pick a couple of shapes and have them rehash all through your illustration.
- Make astounding shape combos: Make your visuals intriguing by revising the fundamental shapes we as a whole know into new and astonishing ones.
03. Freehand illustration
While making straight lines and wonderful shapes is its fundamental benefit, Adobe Illustrator can likewise be utilized for freehand illustration.
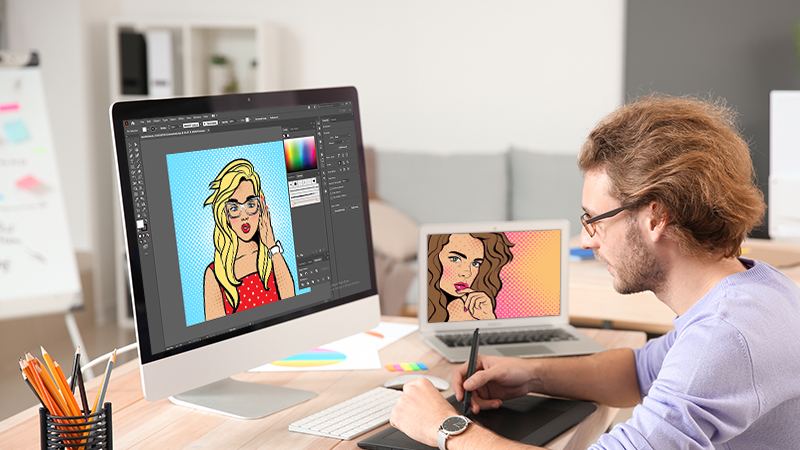
Pixel-based illustration: Using Adobe Photoshop
01. Brushes and strokes
One of the most widely used illustration software, Photoshop brushes, gives endless alternatives to digital art illustrations, in some cases extremely close in their appearance to genuine strokes of pencil, gouache, ink, and that's just the beginning.
There are countless extraordinary brushes out there. However, this bounty can likewise get overpowering. Utilizing a restricted measure of brushes can likewise help create a consistent look through your illustration portfolio.
Adobe Photoshop accompanies a fundamental arrangement of brushes, which is adequate for most employments. If you're hoping to extend your choices, investigate a portion of the expert brush sets that you can buy on the web or download free of charge. To kick you off, look at the arrangement of brushes by artist Kyle T. Webster, offering more than 1,000 great brushes.
Pro tips:
- Own your stroke: For most procedures, it's ideal to utilize a similar stroke style for both drawing and erasing to accomplish bound together shapes and lines. To do this, make your picture on a layered veil, drawing with a white brush and eradicating with a dark brush (exchange between the two by hitting X).
- Be careful with weighty brushes: Some brushes you download online may be too hefty and hinder the program. It's smarter to stay away from these to make a big difference in your work process.
- Trade your shadings effortlessly: One of the advantages of digital illustration art is that you can change your tones and test as many shading range choices as you need.
- Shading with a mask: Create another layer. By holding down the alt key while on an active layer will bring about a little bolt connecting the new layer to the one underneath it, so whatever shading you paint with on the cut-out cover will naturally apply to the substance of your past layer. If things get too complex for you, you can always opt for digital illustration services.
02. Surfaces
Surfaces add profundity to your 2D artwork and make a seriously persuading and bona fide feel. When abused, in any case, they can turn out to be too prevailing and dark the illustration with a grainy haze. Utilize your surfaces admirably and pick your #1 ones to work with, keeping a consistent look.
To bring surfaces into Photoshop, go to layer> New fill layer > Pattern, or snap on the 'Make new fill or change layer' symbol (the highly contrasting circle) at the lower part of the Layers board. Along these lines, each new surface will accompany its own mask, which helps in applying your surface to the pertinent regions as it were.
Pro tips:
Do-It-Yourself your surfaces: Create intriguing surfaces physically with watercolors, acrylics, ink, or even plain paper, and effectively sweep and import them into Photoshop. There are additionally a ton of extraordinary surfaces accessible for download on the web.
03. Make a screen print look
The screen printing look is accomplished when the various shadings appear through their comparing layers, making new tones subsequently. Thus, we prescribe restricting your shading plan to a few tones, binding each tone to a different layer, bringing about three to six unique tones when blended.
The ideal approach to making this impact is by utilizing the Photoshop blending modes – 'Increase' is an incredible alternative, and 'Linear Burn' is acceptable if you're searching for additional differentiation.
Pro tip:
It's occasionally simpler to apply mixing modes on a gathering of layers rather than a solitary one. This makes messing with the layers somewhat more advantageous.
04. Digitize your sketchbook
The Digital illustration doesn't mean you desert pen and paper altogether. With these strategies, you can have the smartest possible solution – getting a charge out of the unique, high-quality allure, just as the tech advantages of making digital artwork.
To bring your sketchbook work into Photoshop, define the boundaries first, trying to work in high contrast with the goal that your PC will effortlessly peruse it. It's desirable to over-utilize a dark pen or marker. However, a pencil can likewise work. Output the picture or take a high-goal photograph of it, making a point to hold the high difference.
When you open your picture in Photoshop, it's an ideal opportunity to isolate your linework from the white paper foundation. Here's the secret:
Select the entire picture (Command or Ctrl + A) and duplicate it. In the 'Channels' window, make another channel which will appear as dark. Glue the picture into the new channel and rearrange it (Command or Ctrl + I) so the picture gets white. Press 'Burden channel as determination' (the dabbed circle symbol at the lower part of the Channels window), with the goal that solitary your picture is chosen. Back in the Layers board, open another layer. Press Command or Ctrl + delete, which will tone in your chose region.
Your linework is currently digitized!
Go from vector to pixel: Using Illustrator and Photoshop
Vector and pixel-based illustration each have their upsides and downsides, and you can profit by uniting the two. While both photoshop or illustrator can be used interchangeably, most artists make their pictures on Illustrator first and afterward continue forward to Photoshop as the following stage for their surfaces and last little details.
Here's the way to take your Illustrator documents to Photoshop the correct way:
When you're content with your Illustrator document, select everything on your artboard and duplicate it.
Go to Photoshop and ensure none of the layers are chosen. When you glue your visuals, you will see a popup window.
Utilizing the dark bolt cursor (A), select each shape independently. For each shape chosen, open another layer in the Layers board. Then, at that point, back in the Path board, click 'Fill way with forefront tone' and 'Stroke way with a brush' (the dark circle and laid out circle symbols at the base left of the board).
You would then be able to erase the cyan framework of the shape or choose to keep it on the off chance that you'd prefer to adjust it later on. This should bring about every one of your shapes on a different layer, colored in and ready to utilize!
In summation
I hope you liked this article and that you were able to dive into the magical world of digital illustration! Let us know how I did, what else you might want to know. Till then, Happy drawing!


The colors of your photos are essential if you want to achieve the effect you want for your photos.
This is the main reason why a lot of photographers apply color grading to their images.
Photo Color correction service will do the following:
Equilibrium the color and contrast of person shots in a scene to make them come into view as if they happen at the same time and a similar location.
Point out certain fundamentals in the border
Do some pioneering alterations due to make the photos look fashionable.

Art Fact India is a team of talented illustrators | Provide Children Books, Medical illustration, copy editing, Animated Explainer Video Services in Delhi, NCR India.
Offer animation related services for the USA, UK, Australia, Japan and other countries.Learn more visit: Art Fact India