


Construction Process: Breaking Ground
You’ve bought your land and secured your loans. You have a great house design and have hired a contractor. Your plans have been approved and you have your permits in place. It’s time to enter the world of Owner Builder Loans. Let the fun begin and discover what the construction process is!
Preparing Your Site

Not for the do-it-yourselfer, this part of the process requires experience, not to mention some pretty heavy equipment.
Of course, before you bring in the bulldozers you are going to have to have the land surveyed. During this part of the process, a professional land surveyor will mark the property boundaries, setbacks, and underground utility lines. At this point, you’ll also want to call the local authorities in charge of protecting accidental damage to underground utilities. This step saves lives and money. If you hit a line during the construction process, the fines can be huge!
Your lot will most likely need to be cleared of brush and shrubs, and you’ll also want to decide which trees to save and which to remove. You’ll need a subcontractor with a bulldozer to remove stumps of large trees. Don’t forget to talk to your contractor about how to protect the trees you want to keep during the building process. You can also claim a Construction Loan for things to be stable and better.
After the lot has been cleared, the next step is grading. Rough grading moves the earth around to create the level ground, while finished grading goes one step further by contouring the yard so that it is nice to look at, while also ensuring that water drains away from the house.
During the site preparation, your contractor will also want to mark where and how your utility connections—water, gas, electricity., cable, sewer, and telephone—will come and go from the house. The utilities should be in place before you begin breaking ground. That is why you need a strong construction budget for the ensuing aspects.
Dealing with Sloping Lots:
If your lot is on a hill, you’ll probably have to do some more serious grading and create a building pad. This flat building pad is where your foundation will lay. In some cases, a retaining wall will have to be built to prevent the land, and your house, from sliding downhill. A three-foot-high retaining wall can be built without cement, while those standing higher require cement.
Drainage:
Good drainage is very important. It is what keeps your basement dry, and your foundation in good shape for years to come! To that end, your contractor will follow the guidelines set forth by the engineer regarding drainage. In a nutshell, your property will be graded with a slight slope away from your home, so that water runs off the property.
In houses with basements sometimes a French drain system is installed. This is a series of trenches at a slight downhill angle dug around the house’s foundation, designed to move water away from the foundation. Pipe with holes in the top is put in the trenches and covered with gravel and dirt. Water is carried through the pipes and away from the house. Voila—the dry basement!
The Foundation
The foundation represents your house’s strength, so get it right! Just think about the job you ask your foundation to do—support all the walls, floors, roofs, and the people who live in it. Learn all and the total cost breakdown of your project. Your contractor will know how much dirt to remove based on your engineering plans.
There are several different foundation types. These are: perimeter footing foundation, concrete slab foundation, and pier-and-grade beam foundation—and the type you choose will depend a lot on where you are building, as well as the kind of home you are building. In most cases, the type of foundation you will build will be decided upon in the planning and design phase of the home-building process.
Once the hole is dug and your foundation is poured you’ll have a good idea of what your house is going to look like on your lot. But before you move on to building make sure the foundation is correct. If there are any problems, you will want to fix them now. The concrete should be hard and secure, and there should be a few cracks. Any hardware should be in place without being broken or bent. Any utility pipes that are protruding should be marked and should have protective collars.
Finally, use a level and a square to determine that all corners are square or at the right angles according to the plan.
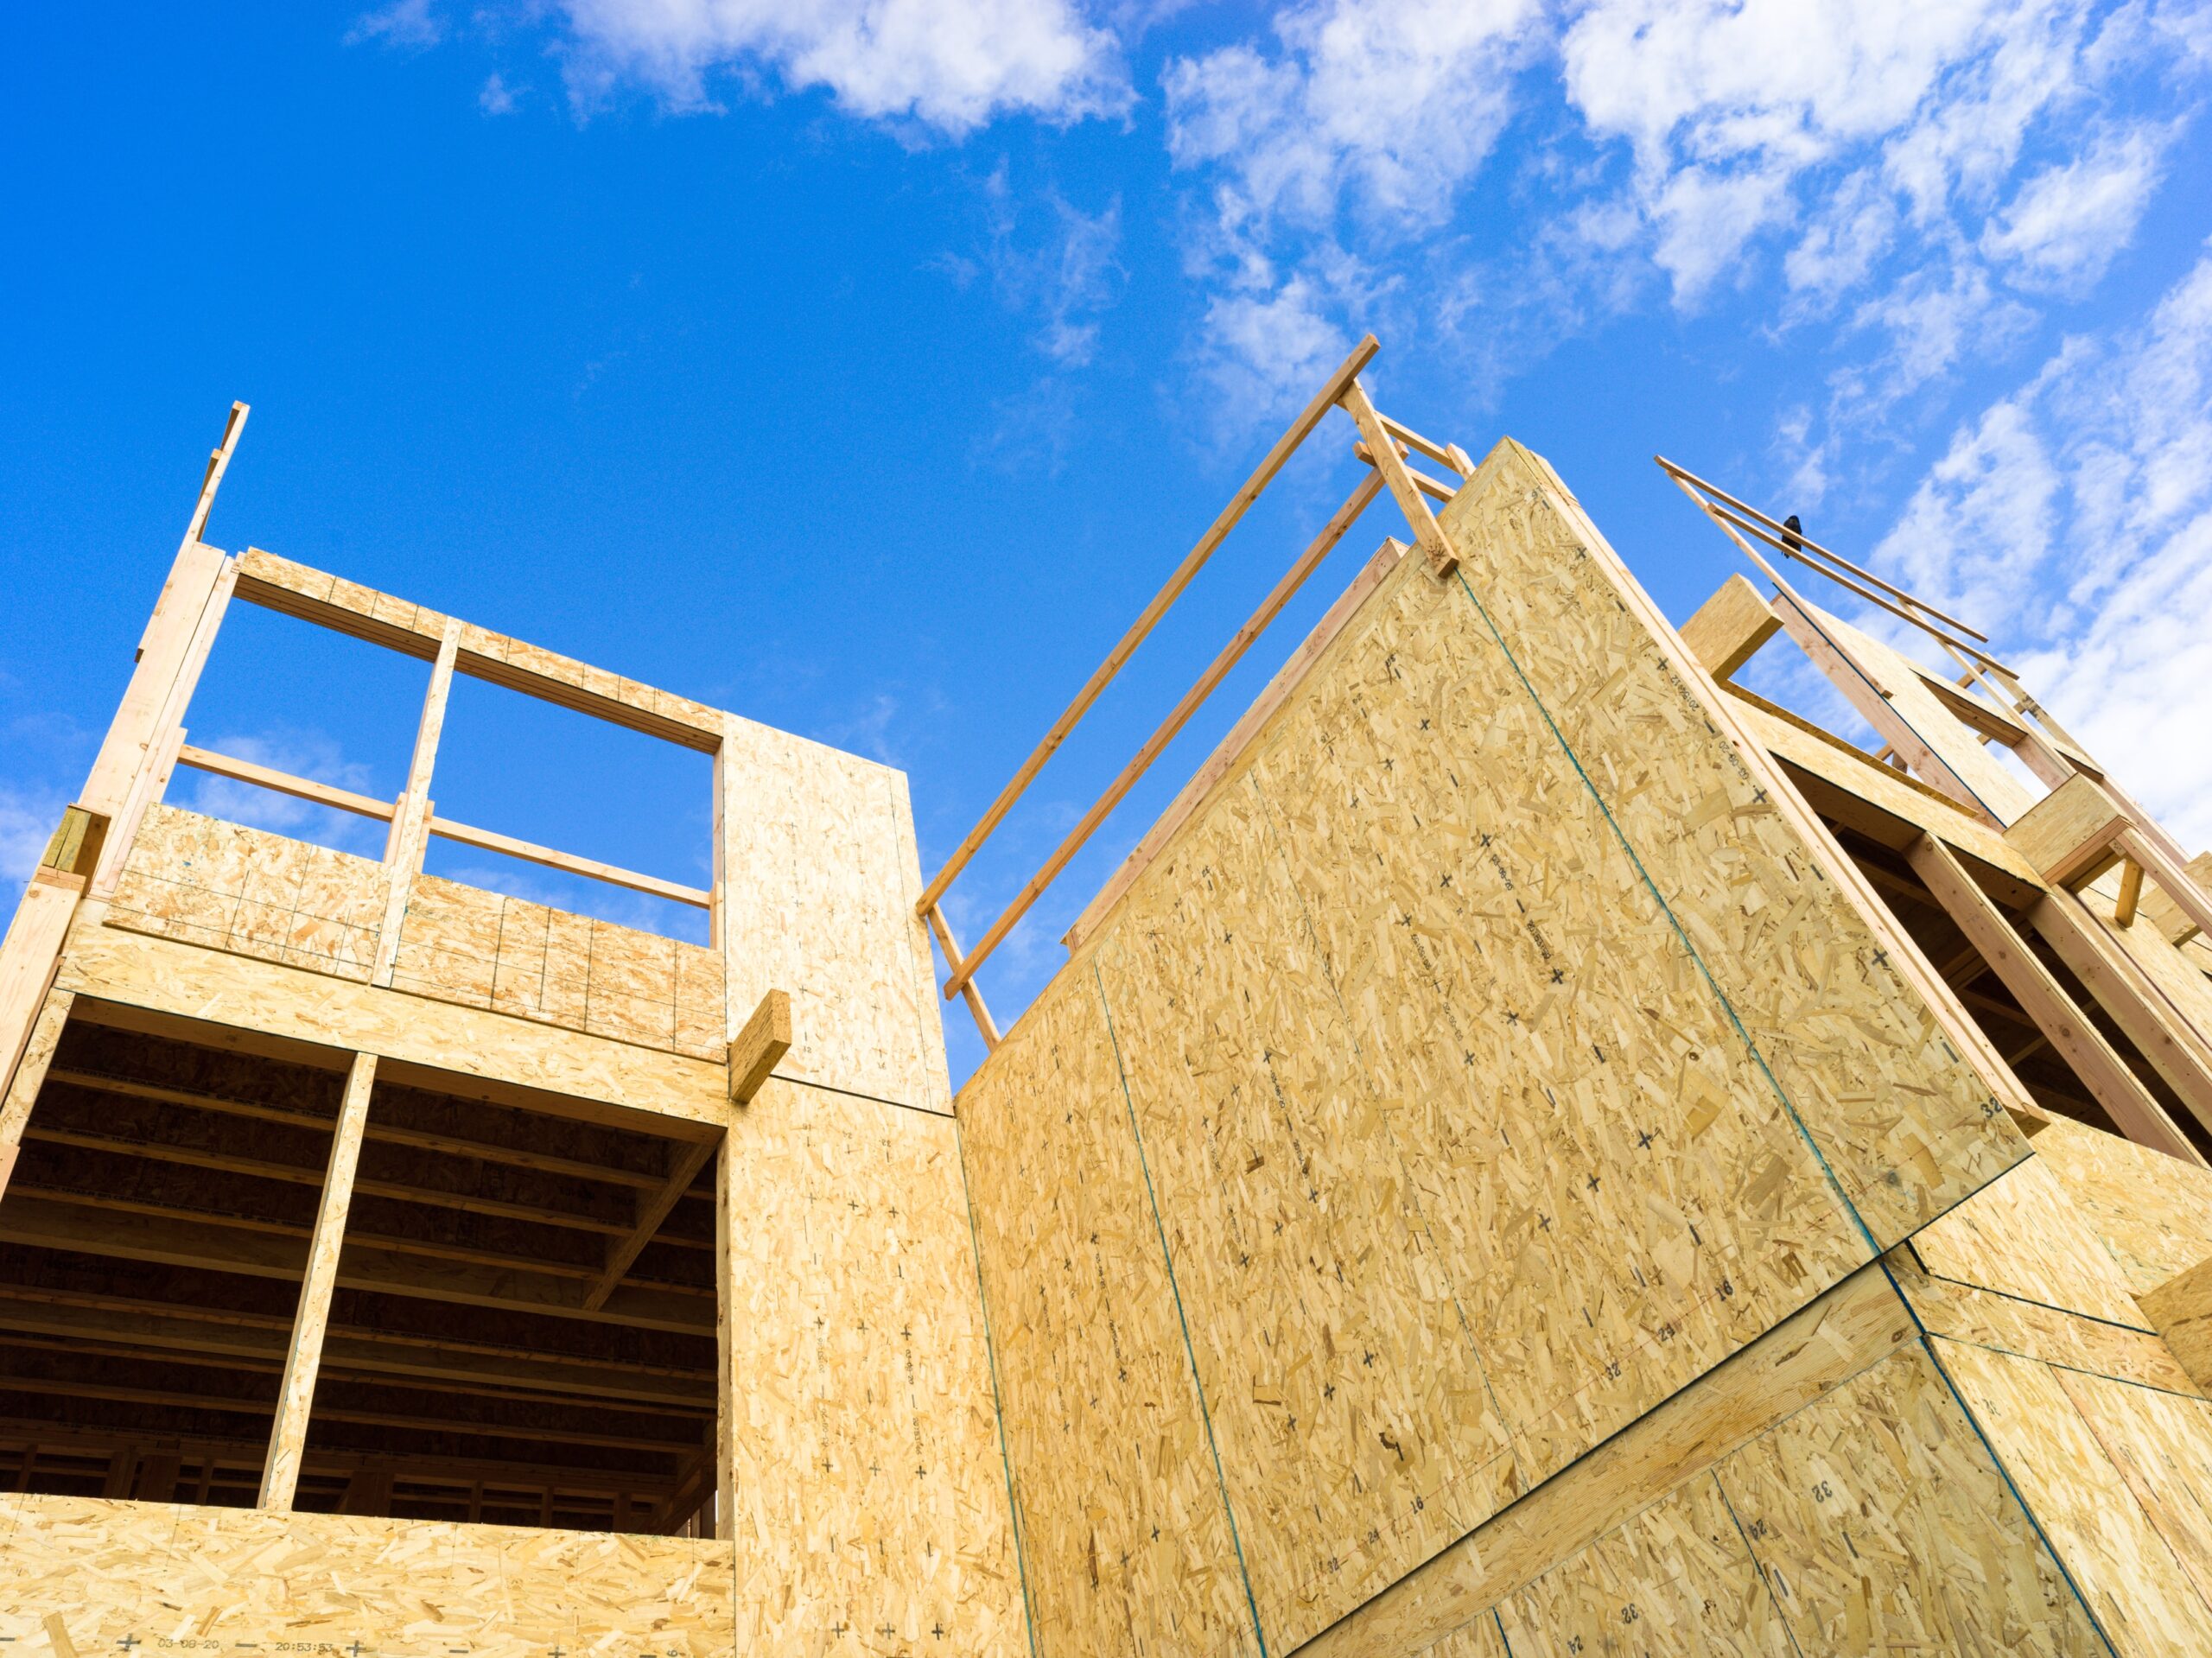
Framing and Roughing: The Bones of Your House
Now that you have the foundation of your house all set, it’s time to set up the bones!
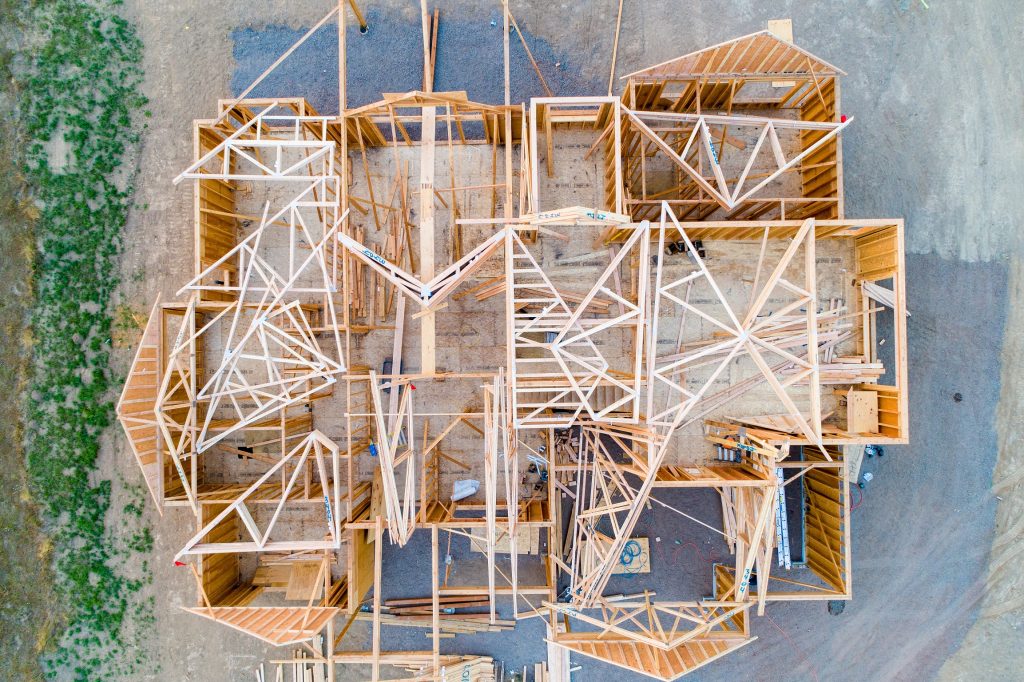
That’s right . . . here’s where your house starts to take shape! At this point, your house’s framing and rough systems will be done. The first thing you want to do, of course, reviews your plans with your contractor. The working drawings will show exactly where the framing and things like electrical and plumbing will go.
At this stage, your contractor is the one who is most likely responsible for coordinating the subs and determining the order of the jobs. Your duties at this point, should you choose to accept them. This includes making sure your contractor keeps you in the loop. While you don’t want to nag your contractor, you certainly don’t want to see delays happen as a result of poor scheduling. To this end, ask your contractor what the schedule is. In which order will everything be completed, and how long should each task take? If you know the answer to this upfront you’ll know if things fall off schedule.
Framing
There are several materials that homes are made of. And we don’t know which one you and your contractor will choose. But regardless of whether you have chosen to frame your home in wood, steel, or log, the process is the same. This section should give you a good working knowledge of how a home is framed. Therefore, you can converse intelligently with your contractor and keep up with progress.
Framing begins with subfloors, which are those base floors that are placed on top of your foundation but beneath your carpet or wood or whatever other flooring surface you choose. The subfloor also serves as a platform for building walls and attaching flooring. Building a subfloor is mostly done using wood, and will be done by a framer or a contractor.
Subfloors comprise girders and joists, which provide support. Other things that will be used during the subflooring process include a seal. This is a metal strip that protects the wood framing from bugs and moisture; a sill plate, which is a pressure-treated piece of wood anchored to the foundation; and the subfloor itself, which is plywood that is laid perpendicular to the floor joists.
Did you know?
There are different grades of plywood? The best grade to use for subflooring is CDX, or CD exterior, which can better handle the elements such as rain.
The next part of the framing process will consist of erecting load-bearing walls. Just like they sound, these walls are designed to support weight and are designated in your working drawings. After the load-bearing walls are framed, the additional walls will be framed. Exterior walls are generally framed first, followed by interior walls. The bottom stories are framed before the top stories.
Your plan may call for 2 x 4s or it may call for 2 x 6s, but regardless the process will be the same. A bottom plank called the sole plate is the base for a series of studs that are placed 16 inches apart. Lumber matching this sole plate, which is called a top plate, caps these studs. A tie plate above the top plates ties the walls together at junctions.
During this process, you can frame the area where your doors and windows are. A header, which is a piece of lumber that distributes the wall’s weight away from the window or door opening, will be used to ensure that the openings don’t compromise wall strength. Trimmers, which side supports that transfer the weight from the header to the sole plate, are also used.
Did you know?
If you have really large fixtures such as special bathtubs or a Jacuzzi for 10, your contractor may have your plumber install them before the framing process is finished. A general rule is, anything that won’t fit through your door openings should be installed now!
If your house has more than one story your contractor will use either platform framing or balloon framing for the second story. With platform framing, the ceiling joists of the first floor do double duty and serve as the floor joists for the next story. After installing the subfloor, framing of the walls is done just like it was on the first story. Balloon framing, by contrast, uses continuous studs running from the sole plate at the base of the house up to the roof.
During the framing process, things like fireplaces, dormers, decks, and soffits will also be accommodated and will begin to take shape.
The last thing to be framed is the roof. Your contractor may use individual rafters, or he may decide to use prebuilt trusses and I-beams. Your roof will be structured according to the house’s basic design, as well as what kind of roofing materials you chose. Slate or clay, which are heavier, for example, have different framing requirements than lighter asphalt. In the end, your working drawings will have a lot to say about how your roof is framed.
Installing the Rough Systems
Once the framing is complete, it is time to add the elements of your home that make it livable. This means water, heat, air conditioning if you choose it, and electricity.
You will already have a plan as to where these things will go and how they will get to your house. Just check out your working drawings. But it’s still a good idea to sit down with your contractor at this stage to talk about who is doing the installation. Additionally, the order in which the tasks will be completed. Again, ask two simple questions that will help you keep on top of whether the process is going according to plan. In what order will the jobs be done? How long will each job take?
Did you know?
Now is a great time to check in with your suppliers to make sure all the electrical and plumbing appliances you ordered are in stock and will be ready when it’s time for them to be installed. You don’t want to hold up your project because the chandelier you picked out for your dining room is on backorder!
Plumbing
During the plumbing stage, your contractor will mark all of the locations, according to your working drawings, of your plumbing fixtures. It’s a good idea to take a walk through your home with your contractor after the markings are made, to make sure they are indeed where you want them. If you want to make any changes, it’s now or never!
The plumber will then install the water supply, the sewer system, and the vent system. The water may come from a public utility, or, if you live in a more rural area, you may have well dug on your property. In either case, hot and cold water pipes will be laid in the framed walls and crawl spaces in your house and will go to every place where you are going to need water. Your plumber will also install a water heater to ensure your showers are toasty warm! But wait! Before you can turn on your water supply the plumber will test it using air pressure and then water. If no leaks are detected, then you are good to go! If leaks are detected, your plumber will fix them before connecting the system to the water supply.
Your plumber will also deal with your sewage system. Your sewer line will either deliver waste to a city treatment plant, or a septic tank on your property. Because sewer systems work according to gravity, the sewer line that leaves your home must be lower than the lowest source of water—sink, toilet, drain, etc.—leaving your home.
Finally, your plumber will install the vent system. The vent system ensures that the water in your home moves in a steady flow. The vents allow air and gases to escape, and your plumbing lines to breathe. At this point, your plumber is done. You may wonder why the pipes are still uncovered at this point. Well, chances are the town or city building inspector needs to check them out and sign off on the plumbing. Make sure you are available for this visit so that you can be made aware of any problems.
HVAC
Your HVAC system will allow air to be circulated in your home for heating, cooling, and circulating purposes. How does the air circulate? In all cases, via ductwork. Your HVAC ductwork system will allow air to be delivered and returned throughout your home via passageways.
How many HVAC units will your home have? That depends greatly upon the complexity and design of your home. At any rate, these choices will have already been made during the design phase of your project.
There will be openings in your walls, called registers, that will allow for air supply and air return. Many times these openings are put near doors and windows to compensate for heat or cold loss. At any rate, your engineer will determine where your registers are placed so that your HVAC system is as efficient as possible.
Each room will have at least one supply duct and one return duct. For heat, the supply will be placed low and the return will be placed high. For cooling systems the opposite is true—the supply will be placed low and the return will be placed high. You’ll need a little extra in rooms like kitchens and bathrooms, and any other room in which you want to install an exhaust fan. These rooms will need power ventilation ducts, which are ducts that require electricity as well as ventilation to the outside.
Ducts are usually made of two materials. Insulating fiberglass ducting can be cut with a knife and has greater insulation. This translates into a lower installation cost overall, and a quieter airflow. Sheet metal ducting is noisier, as temperature changes can cause it to contract and expand. You’ll often find sheet metal ducting in older homes but it is becoming less popular in newer homes because it is more difficult to work with and not as cost-effective.
Electrical
Your electrician will make a careful review of the working drawings before beginning your home’s electrical work. It is important to note that everything must be installed to code.
At this point, it’s a good time to walk around the house with your electrician to tell them exactly where you want outlets, light switches, etc. Again, code will dictate how many of these are installed, but you’ll want to figure out where to put them so they are most convenient. Furthermore, you’ll also want to decide whether you want extras like dimmer switches or outside electrical outlets, and if so where you are going to put them. If you have special systems like a security system, smoke alarm, sound system, cable television, or central vacuum, these should also be taken into consideration.
So, how do you get the lights to turn on? Well, your electrician will run cable or conduits throughout the house in different circuits. The circuits are responsible for distributing the electrical load, which will then tie back into circuit breakers at the main panel. Your electrician may install subpanels. Either way, each circuit will be marked so you know which breaker goes to which outlet. You may also want to talk to your contractor about wiring your home for technology. Be careful to allow for future technology, and don’t spend too much money on today’s technology. Technology changes quickly, so keep in mind that whatever you install may become obsolete.
Sheathing and Flashing
Sheathing and flashing are two of the last things you do before adding the finished work to your custom home. By definition, sheathing and flashing are when you enclose the framing with a covering material to the outside. Sheathing adds strength to the walls, allows you a place to attach the siding, and stabilizes and protects the studs from the load as well as from the weather.
What is sheathing made of?
Well, the most common and least expensive is made of asphalt-soaked fiberboard. At first glance, sheathing seems to have a fragile outer shell, but your contractor will use a special type of nails, combined with protective plates, to keep from harming the sheathing when it is being attached to the studs.
After your contractor nails the sheathing to the studs about every foot or so, a permeable vapor barrier will be attached to the sheathing. This barrier will sit between the sheathing and the siding and will allow the air to pass while keeping moisture out. During this phase, your contractor and his crew will wrap all the windows with window wrap and will tape all seams.
Your roof will need to be sheathed as well, but the material used to sheath your roof is different. Roof sheathing is usually made of weatherproof plywood, and is nailed to the roof rafters or trusses about every eight inches or so. When sheathing the roof, your contractor will leave holes and spaces for any planned vents, ducts, or skylights. And here’s where the flashing part comes in. All of these holes and spaces must have flashing. What is flashing? Flashing is metal stripping that is nailed around the perimeters of these holes, then sealed or caulked, to prevent water leakage.
Once the sheathing and flashing have been completed on your roof, your contractor will most likely stack the roofing material on it until that part of the construction phase is ready to be undertaken. Stacking the roofing material here is not only convenient, but it also prevents the plywood sheathing from warping, expanding, and contracting.
Discover the best alternatives for sheathing at https://www.nahb.org/blog/2019/03/Integrated-Water-Resistive-Barriers-or-Housewrap
Insulation
Now that your home is enclosed, it is time to insulate it. Good insulation will help keep your home nice and warm in the winter, and will also keep it cooler in hot weather.
The type of insulation you are using will most likely have been decided upon in the design phase of your home. Most insulation comes in a blanket-like form, and these can easily be rolled out into the walls and ceilings.
Here is more about insulation: https://eyeonhousing.org/2012/01/windows-insulation-top-list-of-energy-efficient-products-used-by-remodelers/
The Details
Your foundation is complete and you’ve framed and roughed your house. But it’s not time to rest quite yet. Now is the time to make your house a home. That’s right. We are going to talk about all the little details that will complete your home and make it move-in ready. We are talking about finishing the exterior, completing the roofing, and putting in the driveway. After that we’ll move inside and talk about finishing the walls, installing the cabinetry, doing the finished carpentry, putting in the floors, and installing the appliances. We’ve got a lot to cover here, so find a comfortable chair!
The Exterior
Time to give your house some curbside appeal! So let’s talk a little bit about what the outside of your house is going to look like.
What is the first thing people will see when it comes to your house? It’s exterior finishing, of course! To that end, choosing the right exterior treatment is an extremely important decision. Things you’ll want to think about when making your decision include the style of your home, neighborhood guidelines, cost, and personal preference.
When choosing your home’s outside surface, you’ll have three basic choices: siding, stucco, and stone.
Siding is a popular choice and one that many homeowners find appealing. Within the siding category, there are a wide variety of choices as well, including wood, vinyl, aluminum, and cement board.
Of these, wood is probably the prettiest choice, but it is also the one that is most susceptible to the elements. Wood can be expensive on the front end depending upon what type of wood you choose, and you will also have long-term maintenance costs. You’ll have to paint or stain regularly, and may even have to replace if your wood siding falls victim to rot, sun, pests, or moisture.
Synthetic siding materials
Namely aluminum and vinyl—are less expensive upfront and generally have few associated maintenance costs. However, synthetic siding is not nearly as attractive as wood.
Cement board is another siding material. Cement board is cost-effective and not susceptible to rot, insects, moisture, heat, or sun. It looks like wood and you paint it. Even better, the cement board usually needs to be painted only once every 15 years or so. The cement board is easy to install and is fire resistant.
Stucco is another type of outdoor wall covering. A contractor who is applying stucco to a home’s exterior will apply a concrete mixture to a wire lathe, and allow it to dry. A smoothing coat is applied after the first coat is dry. Stucco comes in a variety of colors and textures, and suits many different home styles.
Your home can also be covered in stone or brick. Real brick or stone is expensive and requires specialty subcontractors called masons to apply it. But if you like the look of brick or stone a less expensive option is to apply a masonry veneer, which looks like the real thing but is less expensive and easier to apply.
See more about why this process is an evident part of home construction here: https://eyeonhousing.org/2021/04/buyers-have-diverse-preferences-for-the-homes-exterior-design/

The Roof
When it comes to choosing the type of roof to go on in your home, there are many things to consider. The style of your home, the expense of the materials, how long they last, the environment you live in, and whether or not you have any neighborhood restrictions will all factor into your choice.
The most commonly chosen type of roofing is asphalt shingles. Made of fiberglass and asphalt, this type of shingles generally lasts about 15 or 20 years before having to be replaced.
Laminated fiberglass shingles are made of the same materials as asphalt shingles but are thicker and last 10 or 15 years longer. They come in different textures and shapes and can give your home a custom look. The downside? They cost about twice as much as asphalt shingles.
Standing seam roofs, also called sheet metal roofs, are comprised of large rolled plates of metal. You can find these roofs in a variety of colors, and they are lightweight and easy to install. While they cost about ten times more than asphalt shingles, they also last about three times as long. This type of roof is very popular in snowy areas, as they allow snow and ice to easily slide off.
Slate roofing is beautiful to look at but is very heavy. If you decide on a slate roof, you’ll need some extra reinforcements to hold the weight of this material. Slate is very expensive—about 30 times more than asphalt. That being said, it can last more than 100 years. You’ll have to decide if the beauty and durability are worth the price to you, and whether you are willing to pay for a roof that will most likely outlast you!
Wood shingles are another beautiful choice, and at only five times the amount of asphalt shingles, perhaps a more reasonable choice than slate. That being said, wood shingles last about the same time as asphalt shingles, and are the most flammable choice.
If you live in a high-fire area, consider other options. Regardless of what kind of material your roof is made out of, good drainage is imperative.
Otherwise, water has a way of makings its way into your home! To ensure this is not the case roofers will flash your roof’s valley and angle your roof to channel water down the surface toward the edge. Gutters, which direct the water away from the foundation, will also be installed. Your contractor will be able to figure out how many downspouts to install and the method of drainage at the foundation.
Find out more about roofs here: https://www.nahb.org/blog/2019/03/6-Reasons-to-Invest-in-Green-Roofs
The Driveway
The kind of driveway you have depends on where you live. In rural locations, your driveway may be a simple dirt or gravel road. In more urban areas, it will most likely be concrete or pavement.
No matter what your driveway is made out of, they all do the same job. So what would make someone spend the money necessary to install a concrete driveway when a dirt driveway will serve the purpose just fine? Many neighborhoods have building covenants and restrictions that require you to choose a more finished look. Also, talk to your contractor about the climate you live in, and ask if some choices hold up in your climate more than others.
Did you know?
If you are going to have a driveway with a finished look, such as one made out of concrete or pavement, it’s best to wait until the construction process is almost complete. Nothing ruins a new driveway faster than bulldozers and heavy machinery!
The Interior
Time to move inside! Now we just need to do the finished work on the interior of the home, and it’ll be time to move in! Don’t forget to check if you are still on track with your construction budget spreadsheet.
Walls
Most homebuilders today use drywall, which is made of plaster, gypsum, and heavy gauge paper, to cover interior walls. Because of drywall’s cost and ease of installation it has more or less made the old way of lath and plaster wall covering obsolete.
Drywall comes in sheets of several sizes, and has tapered edges on the long side and full edges on the short side. When the tapered sides are put together they create a channel. Drywall tape is run along the channel, and then a drywall compound, commonly called “mud,” is applied to cover up and hide the joints. When all is said and done you have a nice, smooth wall, and you can’t tell where one sheet of drywall ends and another begins.
Finding a good drywall sub is key, so go with the best you can find, even if he or she is a little bit more expensive. The fit should be tight and smooth and the finishing coats should be so thin that minimal sanding is required.
Did you know?
If the framing of your house is not square, you’ll find out during the drywall phase. Lumber that is warped or not square will make the drywall installer’s job difficult, and if problems are significant, the framer may have to fix them before the drywall process continues.
While you may think that drywall is drywall, you will have a few choices to make. Your rooms might call for drywall with a fancy texture, for example, or you may want to install waterproof drywall in rooms like bathrooms and kitchens.
Understand building pieces like Drywall here https://eyeonhousing.org/2021/04/building-materials-prices-rise-across-the-board-in-march/
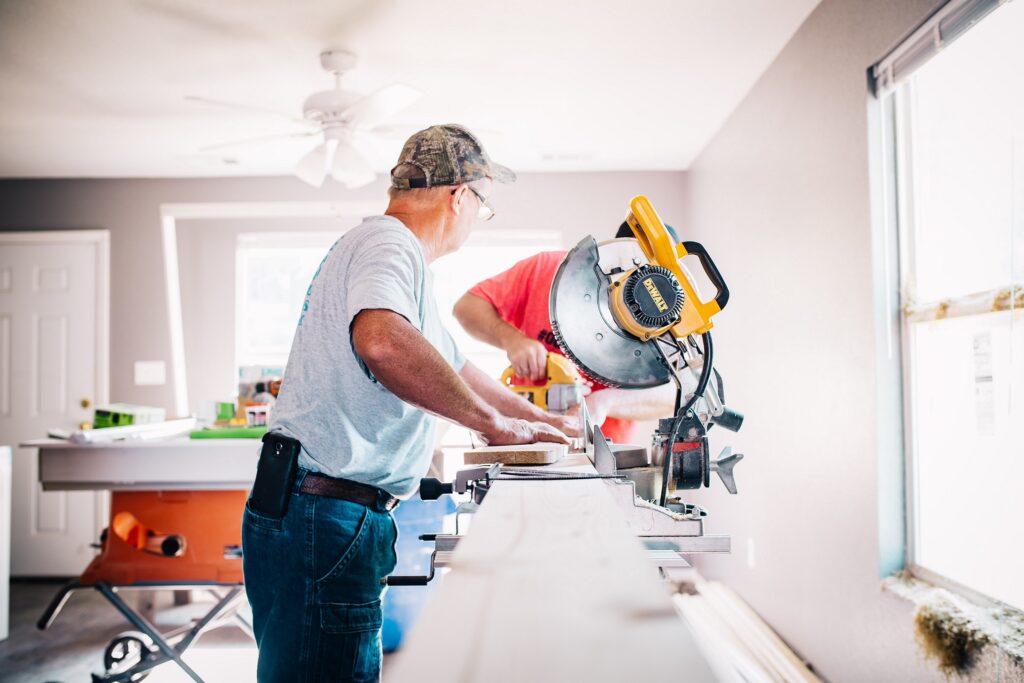
Finish Carpentry
Finish carpentry is what will distinguish your home from other homes. Those special touches are very important, so you want to make sure they are done correctly.
Finish carpenters need lots of skill. After all, they will be doing things like hanging doors, setting door sills, setting window and window sills, installing shelving, installing decorative trim and railings, putting in the crown and base molding, and installing decorative molding like chair rails and wainscoting. They will also be doing things like installing your cabinetry and countertops.
A helpful tip is to make sure that all your supplies match. If you run out of molding in the middle of the job and have to order more, the next shipment may vary in some way. Ordering plenty of supplies from the same supplier not only makes life easier for your finished carpenter but also ensures that the interior of your home has a uniform appearance!
Learn more about this and how is it essential in every construction process here: https://www.nahb.org/blog/2020/10/Put-Your-Guard-Up-Guardrails-Protect-Everyone
Painting
Painting is the last thing you’ll want to do before you get to the really pretty stuff—flooring, appliances, and fixtures. Why does it now? Well, you don’t want to install a really expensive floor only to get paint on it, do you? Also, painting the walls now means you don’t have to paint around appliances and fixtures. And you’ll have a little more room for error!
Lots of people choose to save a little money and paint the interior of their homes themselves. But this is usually before they realize what they are truly in for! Painting is time-consuming, physically demanding, and takes quite a bit of skill. Also, people generally underestimate the sheer volume of things that need to be painted. In addition to walls, you’ll also have to paint all of the doors, trims, and woodwork. And because your house has never been painted before, it will need a coat of primer and two coats of paint.
Murals and faux painting are very popular these days and give a home a custom look.
If you are interested in one of these types of finishes, your contractor can most likely recommend a specialist.
Flooring
Now that the interior of your home is painted, it’s time to install the flooring. Chances are you’ve chosen several different types of flooring and will be using several different subs.
Did you know?
It’s a good idea to do a good, thorough cleaning of the job site, and to set pathways, before installing your new flooring. This will ensure that your flooring stays as clean as possible.
Flooring choices include wood, laminate, vinyl, tile, and carpet.
Wood flooring is expensive up front, but it is beautiful and lasts longer than other types of flooring. There’s a good chance that your wood floors will outlive several generations! Plank flooring can be installed with nails or glue, or a combination of the two. Tongue-and-groove flooring has grooves that allow the pieces to fit up against each other like a puzzle. Parquet flooring is wood flooring with an inlaid design, and is usually installed in squares that are glued or nailed.
Your contractor should have your wood floors delivered a couple of weeks before installation. It should be stored in the actual room it is going to be installed in, to let the moisture content stabilize. This will prevent your floor from gapping after installation.
After the floors are laid they will be sanded, and then stained.
Laminate floors have the appearance of wood or stone at a fraction of the cost. They can also be easier to install and are very durable. The downside is that they don’t last as long as wood, nor are they quite as aesthetically pleasing. Laminate floors that imitate stone usually come in squares, while those that imitate wood come in planks. Laminate floors usually interlock and are attached to the subfloor with glue.
Vinyl floors are durable, and versatile, come in a variety of styles, and are very easy to install. The most difficult aspect of installing vinyl flooring is making sure the patterns work with the angles of walls and the placement of doorways. Some vinyl floors are self-adhesive, while others are applied using a special adhesive for this purpose.
Tile flooring is beautiful and works well in mud rooms, entryways, bathrooms, and kitchens. But tile flooring can be hard to install, and requires someone with experience to get it right. The installation process begins when the tiles are cut, spaced, and laid out. After you approve the design and layout, the tile is put permanently in place using a special adhesive. The spaces between the tiles are filled in with a substance called grout.
Carpet comes in a variety of styles and colors and adds warmth to a room. Buying the most expensive carpet padding you can will not only improve the feel of the carpet, but it will also give it a longer life. The carpet is attached to the walls to a wood strip with wood tacks called a stretcher strip. A good carpeting company should agree to come in a few months later to do a final stretch and adjustment of the carpet if needed.
Know how vital flooring can be here: https://eyeonhousing.org/2020/03/top-features-first-time-home-buyers-want/
Hardware, Appliances, and Fixtures
The last things to go in will be your hardware, fixtures, and appliances. There will be quite a lot to do at this stage, so don’t underestimate the time needed. At this point, you’ll be installing hinges, doorknobs, cover plates for outlets and light switches, lighting fixtures and ceiling fans, thermostats, exhaust fans, toilets, and toilet roll holders, towel racks and soap dishes, medicine cabinets and mirrors, shower rods and doors, faucets, and cabinet and appliance knobs. Whew!
If you have built-in appliances, those should have gone in when you installed your cabinetry and countertops. Free-standing appliances can go in now, once all the painting and flooring are completely installed.
Read more here: https://www.redfin.com/news/home-projects-to-increase-value/
Landscaping
Okay, you can move in now! The only thing you have left to do now is landscape your home. While landscaping can seem like an afterthought, you should know that good landscaping will add significantly to your home’s value.
Hopefully, you set aside a good chunk of change for landscaping at the beginning of this project. But if for some reason you didn’t you may be able to refinance your new home to pay for some of the costs. Of course, to be able to do this your home must be finished.
Landscaping is broken down into two areas: hardscaping and softscaping. Hardscaping deals with things like walkways, pools, fences, and walls, while softscaping deals with trees, shrubs, and plants.
Some people have it in their budget to hire a landscape designer, while others choose to plan their landscaping. Regardless of which way you go, the first step is to revisit your site plan, paying special attention to your house’s location, property lines, placement of windows in your home, site’s topography, site conditions, and location of utilities. This plan will come in very helpful when deciding how to landscape your property.
The next thing you need to decide is what you need, as well as what you want. You’ll need some trees and shrubs, but do you also want vegetable or flower gardens, a water garden, fences, walls, or anything else?
Ask yourself how you intend to use your yard. Are you just concerned with appearance, or do you use your yard to entertain? Do you enjoy gardening, or do you have children and need a play area? Be sure to consider your area’s climate when planning trees, shrubs, and plants. Some species thrive in one area only to perish in another. Plants are expensive, so no need to buy anything that doesn’t have a good chance of surviving!
Once you have an idea of your wants and needs, ask yourself how much time you have to maintain your yard. If you plan on hiring someone to maintain it, fine. But if not, you’ll have to understand that the more complex your yard is, the more time you’ll maintain it during your free time.
The goal here is to come up with some sort of balance.
Once you think you know what your want your yard to look like, put your plan down on paper. There are computer programs designed for just this purpose, that make landscape design easy. Look over the plan carefully, and change things that don’t seem to be working. Once you have your plan completed, you are ready to put it into action!
Moving In: Some Final Thoughts
You are finally done. The last brushstroke of paint has dried. Congratulations! You can now move into your home!
To move into your home, you’ll have to acquire a Certificate of Occupancy from the city or county building inspectors. To get this, your property will be subject to one final inspection. Hopefully, it will pass with flying colors, and you’ll be good to go!
Now it’s time to attend to your house’s financial details. If you chose an all-in-one loan, you are ready to roll it into a permanent mortgage.
Did you know?
You’ll need to have paid all of your workers in full before you button up the financial details of your home and move into it. Otherwise, workers can attach liens on your home, which will make financing impossible.
The rollover is simple, but you’ll still need some paperwork on hand. You’ll need:
- The final draw request. This is the money your lender puts aside until the house was complete, and is usually about 10 percent or so of the loan.
- Final lender inspection. This is the final inspection done to ensure that all the work was done according to plan.
- Copy of the Certificate of Occupancy.
- Lien releases. All subs and contractors will have to sign releases stating that they have been paid in full.
- Verification from the title company. So the lender knows that the property is still yours.
- Your Homeowner’s Insurance policy.
Depending upon the loan program you chose and your lender, once you furnish these papers you may have the option of changing your interest rate or loan program. Once your loan is rolled over, congratulations, you are officially done with the home-building process. No more stressing out about a long list of residential construction line items and other building details.
Now all you need to do is keep an eye on rates and loan programs. If a better deal comes along, you may want to refinance down the road. In the meantime, enjoy your new home!
Link: https://builderloans.net/a-step-by-step-guide-to-the-construction-process/


Find Under Construction Residential Projects in Noida, Under Construction Flats/apartments in Noida Extension, with in budget cost of Under Construction apartments in Gaur city 2 Greater Noida West.
