


Tiling is the process of laying tiles to create a surface or covering for floors, walls, or other surfaces. Here are some general steps on how to tile:
- Prepare the surface: Ensure that the surface to be tiled is clean, level, and free of any debris or loose material. Use a suitable adhesive or grout remover to remove any old tiles or adhesives if necessary.
- Measure and plan: Measure the area to be tiled and plan the layout of the tiles to ensure that they fit correctly and look aesthetically pleasing. Make any necessary cuts to the tiles using a tile cutter or tile saw.
- Apply adhesive: Apply a suitable adhesive to the surface with a trowel, following the manufacturer's instructions. Make sure to work in small sections to avoid the adhesive drying out.
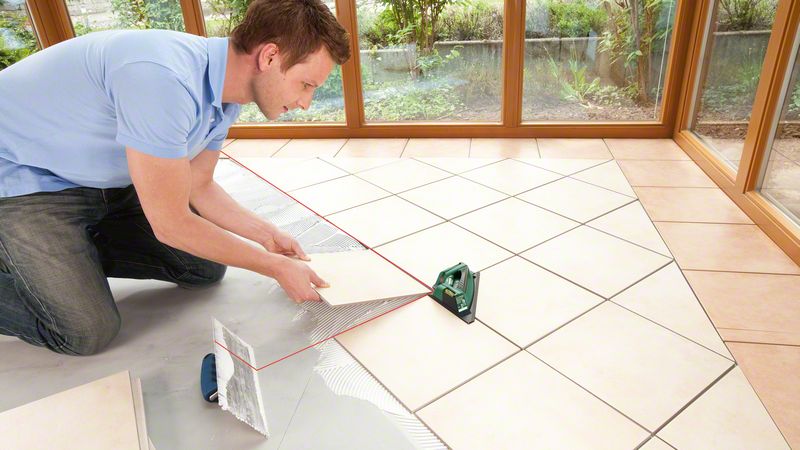
- Lay the tiles: Place the tiles onto the adhesive, starting from the center and working outward. Use tile spacers to maintain an even gap between tiles, and check the alignment and level of each tile as you lay them.
- Cut tiles: Use a tile cutter or tile saw to cut any tiles that need to fit around edges or corners.
- Grout the tiles: Once the adhesive has dried, apply grout between the tiles using a rubber float. Work in small sections and remove any excess grout with a damp sponge. Allow the grout to dry for at least 24 hours.
- Clean the surface: Once the grout has dried, clean the surface of the tiles with a damp cloth or sponge to remove any remaining grout residue.
Tiling can be a time-consuming process that requires careful planning and attention to detail. It's important to follow the manufacturer's instructions for the adhesive and grout, and to use the correct tools and safety equipment.

which tools we need for that
Here are some of the tools that are typically used for tiling:
- Tile cutter or tile saw: A tile cutter or tile saw is used to cut tiles to the required size or shape.
- Trowel: A trowel is used to spread adhesive onto the surface before laying the tiles.
- Tile spacers: Tile spacers are used to maintain an even gap between tiles while they are being laid.
- Rubber float: A rubber float is used to apply grout to the tiles after they have been laid.
- Notched trowel: A notched trowel is used to apply adhesive to the surface in a specific pattern, depending on the type and size of the tiles being used.
- Spirit level: A spirit level is used to ensure that the tiles are laid evenly and level.
- Grout float: A grout float is used to apply and spread grout between tiles.
- Sponge: A sponge is used to clean and smooth the grout after it has been applied.
- Safety glasses: Safety glasses should be worn to protect the eyes from flying debris when cutting tiles.
- Dust mask: A dust mask should be worn when cutting tiles to avoid inhaling any dust or debris.
- Measuring tape: A measuring tape is used to measure the dimensions of the surface to be tiled and to ensure that tiles are cut to the correct size.
- powder-tile-glue:Powder tile glue, also known as dry-set mortar, is a mixture of Portland cement, sand, and other additives that is used to bond ceramic, porcelain, or natural stone tiles to various substrates such as concrete, cement board, or plywood. The powder form of the adhesive is mixed with water to create a paste-like consistency that can be spread onto the surface with a notched trowel before laying the tiles.
These are some of the tools commonly used for tiling, although the specific tools required may vary depending on the type of tiles being used and the size and complexity of the project.
benefit of glue tile
Glue-down tile installation offers several benefits, including:

- Durability: Glue-down tile installation provides a strong bond between the tile and the subfloor, resulting in a durable and long-lasting flooring solution.
- Stability: Glued-down tiles remain stable, even in high traffic areas, which helps prevent cracking or shifting of the tiles.
- Moisture resistance: Glue-down tiles are more resistant to moisture than other types of tile installation, such as floating or click-lock tile, which can be prone to warping or separating when exposed to moisture.
- Noise reduction: Glue-down tiles can help reduce noise transmission, making them a good choice for use in multi-level buildings or areas where noise is a concern.
- Easy maintenance: Once installed, glue-down tiles are easy to clean and maintain, requiring only regular sweeping and mopping to keep them looking their best.
- Design options: Glue-down tiles come in a wide variety of colors, patterns, and textures, allowing for a wide range of design options to fit any style or décor.

Overall, glue-down tile installation can be a great choice for many different types of flooring projects, offering a durable, stable, and low-maintenance solution that can look great and perform well for years to come.


