


In today's visually-driven digital world, the significance of high-quality product photography cannot be overstated. Effective product images are not just about showcasing the physical attributes of a product but also about capturing the attention of potential customers, conveying the brand's identity, and ultimately driving sales. In this article, we will delve into the art of product photography, exploring the key elements of composition, styling, and editing that contribute to creating captivating images that resonate with audiences.
Introduction to Product Photography
Let's face it, in the age of endless scrolling and online shopping, quality product photography is your ultimate wingman. It can make or break a sale faster than you can say "add to cart." So, buckle up and get ready to dive into the world of creating drool-worthy product photos that will have customers lining up to buy what you're selling.
In a world where first impressions are everything, quality product photography is your secret weapon to stand out in a sea of online competition. It's like the metaphorical equivalent of putting on your best outfit for a job interview – you want to look your absolute best to make a lasting impression. Good product photos showcase your items in their best light (literally) and help build trust with your customers.
When it comes to creating jaw-dropping product photos, it's all about finding that sweet spot between composition, styling, and editing. Think of it as a three-part harmony – you need the right notes to create a masterpiece. Composition sets the stage, styling adds the flair, and editing polishes it all up to perfection. In this article, we'll break down each element to help you level up your product photography game.
Understanding Composition in Product Photography
Composition is like the unsung hero of product photography – it's the backbone that holds everything together. From the rule of thirds to choosing the perfect angles, mastering composition can take your photos from meh to magnificent in no time.
Forget about splitting the bill evenly – in product photography, it's all about the rule of thirds. This golden rule divides your frame into thirds both horizontally and vertically, creating a grid that guides your eyes to the most important parts of the photo. Throw in some leading lines and framing techniques, and you've got yourself a recipe for composition success.
Just like finding your good side in a selfie, choosing the right angles and perspectives can make or break your product photos. Experiment with different viewpoints to showcase your items in the best light – sometimes all it takes is a slight tilt or a bird's eye view to make your products pop off the screen.
Styling Techniques for Product Photography
Styling is where you get to unleash your inner creative genius and make your products shine brighter than a unicorn's horn. From selecting props and backgrounds to creating a cohesive brand aesthetic, styling is your chance to tell a visual story that captivates your audience.
Props are like the supporting actors in your product photos – they add depth, context, and a touch of personality. Choose props that complement your products without stealing the spotlight, and pair them with backgrounds that enhance the overall vibe you're going for. Remember, less is often more when it comes to styling.
Styling isn't just about making your products look pretty – it's also a powerful tool for building brand recognition and establishing a consistent visual identity. Think of styling as your brand's signature style, a visual language that speaks to your target audience and sets you apart from the competition.
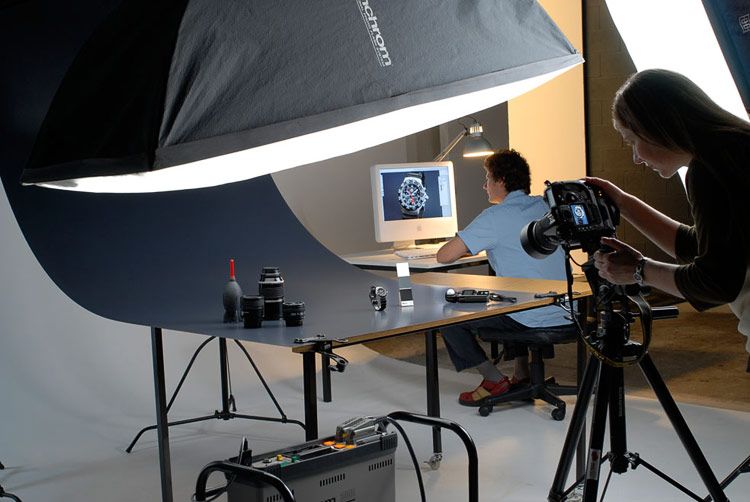
Lighting Essentials for Capturing Product Images
When it comes to product photography, lighting is the MVP that can make or break your photos faster than you can say "cheese." Whether you're team natural light or artificial lighting, understanding the pros and cons of each and mastering key lighting setups is essential for capturing those drool-worthy product images.
Natural light is like the holy grail of lighting for many photographers – it's soft, flattering, and free (thanks, sun). On the other hand, artificial lighting gives you more control over the intensity and direction of light, perfect for creating consistent results regardless of the weather outside. Each has its pros and cons, so choose wisely based on your shooting environment and desired aesthetic.
From softboxes to ring lights, there's a whole arsenal of lighting setups to choose from when it comes to product photography. Whether you're going for a clean, minimalist look or a dramatic, high-contrast vibe, mastering key lighting setups like the three-point lighting or the Rembrandt lighting technique can take your product photos from amateur to pro in no time.
Editing Tools and Techniques for Enhancing Product Photos
Alright, let's dive into the world of editing software! Just like how a budding chef relies on their favorite set of knives, photographers rely on editing tools to finesse their shots. Popular software Dresma of the editing world, helping you elevate your photos from "meh" to mesmerizing. This tool offers a plethora of features, from adjusting colors to removing unwanted blemishes, making them essential for polishing up your product images. You can enhance your product photography.
Color correction is like adding salt to a dish – a little goes a long way. It can make your products pop by adjusting hues and tones to their truest form. Cropping is like trimming the fat off a steak; it helps you focus on the main subject and cuts out any distractions. And let's not forget retouching, the makeup of the editing world – it smooths out imperfections and enhances the overall look of your product. These basic editing techniques are the bread and butter of refining your product photos, so don't skip them!
Advanced Tips for Achieving Professional Product Photography Results
Imagine your product photo as a superhero trying to save the day – focus stacking is like giving them super strength. By combining multiple images taken at different focal points, you create a final image that is tack-sharp from front to back. This technique is a game-changer for products that demand razor-sharp detail, giving your photos that professional edge.
Filters and special effects are like the sprinkles on top of your cupcake – they add that extra oomph to make your product photos stand out. Whether it's adding a vintage vibe with a film filter or creating a dreamy atmosphere with a soft focus effect, these creative tools can help you inject personality and style into your images. So go ahead, play around with filters and special effects to give your product shots a unique and eye-catching twist!
Conclusion
Mastering the art of product photography is a valuable skill that can elevate your brand's visual presence and impact your bottom line. By understanding the principles of composition, styling, and editing, and incorporating lighting techniques and advanced tips, you can create stunning product images that stand out in a crowded marketplace. Whether you are a seasoned photographer looking to enhance your product photography skills or a business owner aiming to improve your marketing visuals, investing time and effort into perfecting your product photography can yield significant benefits. Start implementing the techniques discussed in this article to take your product photography to the next level and make a lasting impression on your audience.


