


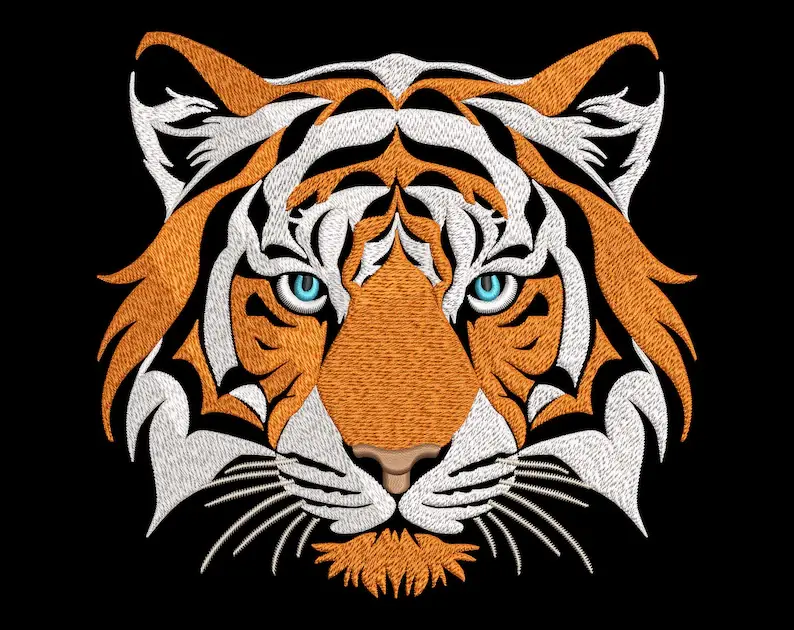
3D embroidery is a creative and impactful technique that adds texture and dimension to your designs, making them stand out from traditional flat embroidery. Whether you're adding puff embroidery to hats, jackets, or any other fabric, mastering 3D embroidery can elevate your projects to a professional level. Embroidery machines like the Baby Lock Altair 2, Baby Lock Meridian 2, and Baby Lock Capella are well-equipped to handle 3D embroidery with precision, offering both versatility and ease of use for various applications.
This guide will walk you through the step-by-step process of creating 3D embroidery with your embroidery machine. By the end, you will know how to set up your machine, choose the right materials, and apply the techniques needed for stunning 3D embroidery.
1. Understanding 3D Embroidery
3D embroidery, often called puff embroidery, is created by using a foam material under the top stitches of your design, which gives it a raised, three-dimensional effect. This technique is popular for creating bold designs on hats, bags, and even clothing.
Embroidery machines like the Baby Lock Altair 2 come with advanced stitching options that make it easier to create dense stitch patterns necessary for 3D embroidery. The foam is compressed by the dense stitching, and any excess material is trimmed away, leaving behind a raised effect.
Benefits of 3D Embroidery
- Adds texture and dimension to designs.
- Ideal for branding and logos.
- Creates a professional, high-impact look on apparel and accessories.
2. Preparing for 3D Embroidery
Before starting, it’s important to gather all the necessary materials and set up your machine properly for 3D embroidery. Here’s what you need:
A. Materials Required
- Foam: Choose embroidery foam specifically designed for 3D puff embroidery. The foam is available in various thicknesses, with 3mm being the most common for creating a raised effect.
- Embroidery thread: High-quality polyester thread works best for 3D embroidery, as it provides durability and a smooth finish.
- Stabilizer: Depending on your fabric, you will need a stabilizer to support the design and prevent puckering. Tear-away stabilizers are commonly used for 3D embroidery.
- Fabric or item to be embroidered: Ensure that the fabric is suitable for 3D embroidery, such as hats, denim, or thick cotton.
B. Setting Up Your Machine
- Install a sharp needle: Use a 75/11 sharp needle or a similar size to ensure clean and precise stitching, as 3D embroidery requires penetrating foam and fabric layers.
- Choose a dense stitch pattern: In the settings of your Baby Lock Altair 2, Baby Lock Meridian 2, or Baby Lock Capella, select a dense stitch pattern. Designs with wide, bold satin stitches work best for 3D embroidery.
- Prepare your embroidery hoop: Hoop the fabric with the stabilizer securely in place. Make sure the fabric is tight and stable, as loose fabric can affect the stitching quality.
3. Step-by-Step Guide to Creating 3D Embroidery
A. Choosing or Creating Your Design
For 3D embroidery, simple designs with thick lines and minimal intricate details work best. Logos, block letters, and bold shapes are ideal for this technique. If you are creating your design from scratch, use software that allows you to digitize for 3D embroidery. Machines like the Baby Lock Altair 2 and Baby Lock Meridian 2 come with built-in design software that allows you to adjust stitch density and design size.
Make sure that the stitch density is high enough to cover the foam adequately. The stitches need to compress the foam and create a uniform raised look without leaving gaps.
B. Placing the Foam
Once your fabric is hooped and your design is selected, it’s time to add the foam. Cut a piece of embroidery foam that’s slightly larger than your design. Place the foam on top of your hooped fabric, ensuring that it covers the entire design area. The foam will be held in place by the stitches.
C. Stitching the Design
Start your embroidery machine and allow it to stitch over the foam. The Baby Lock Capella and other models offer smooth and consistent stitching, which is essential for 3D embroidery. As the machine sews, the stitches will compress the foam, and the excess material around the design will begin to lift.
Pay close attention to the density of the stitching. The key to good 3D embroidery is ensuring that the foam is completely covered by stitches. If you notice any gaps, you may need to increase the stitch density for future designs.
D. Removing Excess Foam
Once the stitching is complete, carefully remove the hoop from the machine. Gently tear away the excess foam from the outside of the stitched design. The foam under the stitches should remain intact, giving your design its 3D effect. You can use tweezers to remove any small pieces of foam that may be stuck in tight areas.
E. Final Touches
After removing the excess foam, give your design a quick press with a steam iron. Be careful not to press too hard, as you don’t want to flatten the 3D effect. Light steam can help settle the stitches and remove any residual foam pieces.
4. Troubleshooting Common 3D Embroidery Issues
Even with the right setup, you may encounter some challenges when creating 3D embroidery. Here’s how to address some of the most common issues:
A. Thread Breakage
If your thread keeps breaking during 3D embroidery, check that your needle is sharp enough to handle the foam. Dull needles can struggle to penetrate the foam, causing thread breaks. Additionally, make sure that your thread tension is set correctly.
B. Gaps in the Design
Gaps in the design can occur if the stitch density is too low. Always choose a dense stitch pattern for 3D embroidery, as it ensures that the foam is fully compressed and hidden beneath the stitches.
C. Foam Shows Through the Stitches
If foam is showing through the stitches, it could mean that the foam is too thick for the design or that the stitch pattern is too light. Thinner foam or increased stitch density should resolve this issue.
5. Best Practices for 3D Embroidery on Different Fabrics
Certain fabrics are better suited to 3D embroidery than others. Here’s how to choose the right fabric for your projects:
A. Structured Fabrics
Fabrics like hats, denim, and canvas work best for 3D embroidery because they provide a stable base for the foam and stitches. These fabrics hold the 3D effect well and maintain the raised look over time.
B. Stretch Fabrics
Avoid using stretch fabrics like jersey or spandex for 3D embroidery, as these materials tend to warp under the foam and stitches, which can distort the design.
C. Testing on Scrap Fabric
Before starting a large project, it’s always a good idea to test your design on a scrap piece of fabric. This allows you to check that the stitch density, foam thickness, and thread tension are correct for the fabric you plan to use.
Conclusion
Creating 3D embroidery with your machine is an excellent way to add texture and impact to your designs. Whether you're using the Baby Lock Meridian 2, following the right techniques will ensure professional-looking results. By choosing the right materials, setting up your machine correctly, and troubleshooting any issues, you can master the art of 3D embroidery and produce stunning, dimensional designs on a wide range of fabrics.
FAQs
Q1: What type of foam should I use for 3D embroidery?
For 3D embroidery, you should use embroidery foam specifically designed for puff embroidery. This foam is available in different thicknesses, but 3mm is the most common. It is sturdy enough to create a raised effect but soft enough to be compressed by stitches.
Q2: Can I create 3D embroidery on any fabric?
While you can attempt 3D embroidery on a variety of fabrics, it works best on structured materials like hats, denim, or canvas. These fabrics provide a stable base for the foam and prevent distortion of the design.
Q3: How do I prevent gaps in my 3D embroidery design?
To prevent gaps, ensure that the stitch density is high enough to cover the foam completely. Increasing the stitch density will allow the foam to be compressed evenly, leaving no visible gaps.
Q4: What happens if foam shows through the stitches?
If foam is visible through the stitches, it may be too thick for the design, or the stitch density may be too low. Try using thinner foam or increasing the stitch density to resolve the issue.
Q5: How do I remove excess foam from the design?
After stitching, carefully tear away the excess foam around the edges of the design. Tweezers can help remove small pieces of foam stuck in tight areas. If needed, a light steam from an iron can help smooth out the final look.


The most recent and most powerful trend home based sewing is machine embroidery.
Digitized designs stitched by sewing computers give professional results that previously were available only from commercial embroiders.
Today's embroidery machines go beyond this, helping you to personalize designs and stitch as much as 16"x10" in a single wishing.
You can now personalize everything with highly-colored designs and lettering stitched inside your sewing room.When looking for an embroidery machine, you will find three primary facts to consider:Figure out how much space you need to dedicate to embroidery.
If all for you to do is stitch preprogrammed designs, you do not need as elaborate a piece of equipment while you do if you wish to personalize and digitize your personal designs.Consider the kind of projects you need to embroider.
Would you like to only stitch simple monograms on terry towels or are you currently planning lavish designs over the backs of jackets?Embroidery machines are offered as stand-alone machines that just do embroidery, or they are members of a method comprised of a stitching machine along with a separate unit put into the device to stitch embroidery designs.

This report provides an in-depth study of the "Global Garment Processing Equipment Market 2020" using SWOT analysis that is Strength, Weakness, Opportunities, and Threat to the organization.
This marketing research report is concentrated at providing its reader with all the required details which will help them make necessary business decisions.
It provides wholesome information that's necessary to know the market inside-out.Key Player Mentioned: Brother, Singer, Janome, Pegasus, Baby Lock, Bernina, Toyota, Viking, Shang Gong Group, Feiyue, Ramsons, ZOJE, Typical, Jack, GemsyRequest Sample Copy @t: https://introspectivemarketresearch.com/request-samples.php?_id=11&_sid=3751This report aims to measure the market size and future growth capability of the Garment Processing Equipment Market crosswise over various segments, for instance , product, equipment, vertical, technology, and region.
The report aims to research each section with reference to singular development patterns and commitment towards the general market and to supply comprehensive data with reference to the most considerations that impact the event of the market .The aim is to deliver competitive intelligence from the marketing research and devise revenue growth strategies from the market size and forecast statistics.Product Segment Analysis: Cutting Equipment, Overlock Machine, Sewing MachineApplication Segment Analysis: Small Enterprise, Medium Level Enterprise, Large EnterpriseRegional Segment Analysis: North America, China, Europe, Southeast Asia, Japan, IndiaThe factor that's expected to affect this global market is mentioned within the report that employment rates are rising during investment in emerging economies.
Export incentives and powerful trade agreements offered by many competitors are other factors that favor growth rates within the global market.
Competitive situations and trends, the report explores the market, recent mergers and acquisitions, and expansion strategies to assist readers and players understand the whole market.

The Sewing and Embroidery Machine Market Research Report 2025 (covering USA, Europe, China, Japan, India, South East Asia and etc), is an informative market report offered by DecisionDatabases.com.Sewing and Embroidery Machine market research report provides the newest industry data and industry future trends, allowing you to identify the products and end users driving Revenue growth and profitability.The industry report lists the leading competitors and provides the insights strategic industry Analysis of the key factors influencing the market.The report includes the forecasts, Analysis and discussion of important industry trends, market size, market share estimates and profiles of the leading industry Players.Final Report will cover the impact of COVID-19 on this industry.Access Full Report with Table of Contents @ https://www.decisiondatabases.com/ip/50353-world-sewing-and-embroidery-machine-marketThe Players mentioned in our reportTajimaSingerBrotherShang Gong GroupFeiyueGemsyZOJEJackToyotaJuki CorporationMaqiBerninaJaguarBaby LockMAXSunStarTypicalPegasusJanomeVikingXinsheng Sewing EquipmentBarudanYuelong Sewing EquipmentJingwei ElectronicShenshilei GroupFeiyaMayaZSKFeiying Electric MachineryHappyJapanGlobal Sewing and Embroidery Machine Market: Product Segment AnalysisSewing MachineEmbroidery MachineGlobal Sewing and Embroidery Machine Market: Application Segment AnalysisTextileFashionGlobal Sewing and Embroidery Machine Market: Regional Segment AnalysisUSAEuropeJapanChinaIndiaSouth East AsiaDownload Free Sample Report of World Sewing and Embroidery Machine Market @ https://www.decisiondatabases.com/contact/download-sample-50353There are 10 Chapters to Deeply Display the World Sewing and Embroidery Machine Market.Chapter 1 About the Sewing and Embroidery Machine IndustryChapter 2 World Market Competition LandscapeChapter 3 World Sewing and Embroidery Machine Market shareChapter 4 Supply Chain AnalysisChapter 5 Company ProfilesChapter 6 Globalisation & TradeChapter 7 Distributors and CustomersChapter 8 Import, Export, Consumption and Consumption Value by Major CountriesChapter 9 World Sewing and Embroidery Machine Market Forecast through 2025Chapter 10 Key success factors and Market OverviewPurchase the complete World Sewing and Embroidery Machine Market Research Report @ https://www.decisiondatabases.com/contact/buy-now-50353Other Reports by DecisionDatabases.com:World Polyester Sewing Thread Market Research Report 2023(Covering USA, EU, China, South East Asia, India, Japan and etc)World Sewing Threads Market Research Report 2025(covering USA, Europe , South East Asia, China, India and etc )About Us:DecisionDatabases.com is a global business research report provider, enriching decision makers and strategists with qualitative statistics.
DecisionDatabases.com is proficient in providing syndicated research Reports, customized research reports, company profiles and industry databases across multiple domains.Our expert research analysts have been trained to map client’s research requirements to the correct research resource leading to a distinctive edge over its competitors.
We provide intellectual, precise and meaningful data at a lightning speed.For More Details:DecisionDatabases.comE-Mail: sales@decisiondatabases.comPhone: +91 9028057900Web: https://www.decisiondatabases.com