


Upgrading your home's entry door can significantly enhance its curb appeal, improve energy efficiency, and bolster security. Entry door installation is not just about replacing an old door; it’s about creating a welcoming entrance that complements your home's architectural style while providing functional benefits. Whether you're a seasoned DIY enthusiast or new to home improvement, this guide will provide valuable tips to ensure your installation process is seamless and successful.
Why Upgrade Your Entry Door?
Before diving into the installation process, it’s essential to understand the benefits of upgrading your entry door:
Preparing for Entry Door Installation
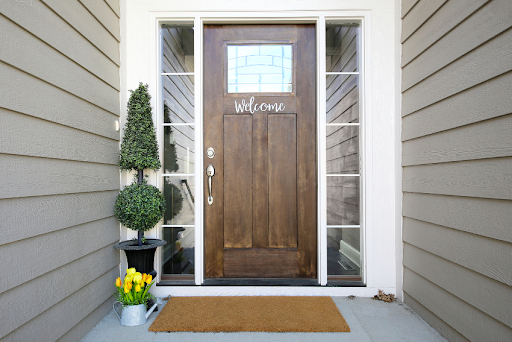
1. Choose the Right Door
Selecting the right door is the first step. Consider the following factors:
2. Gather Necessary Tools and Materials
Having the right tools on hand will make the installation process smoother. Essential tools typically include:
Additionally, consider purchasing weather stripping and insulation materials to enhance energy efficiency.
3. Prepare the Area
Clearing the area around the existing door is essential for safe and efficient installation. Remove any furniture, decorations, or obstructions that may hinder your progress. If you’re replacing an old door, carefully remove it and inspect the frame for any damage. Addressing any issues at this stage will help prevent complications later on.
Step-by-Step Guide to Entry Door Installation
Step 1: Remove the Old Door
Carefully remove the existing door from its hinges using a screwdriver. If the door frame is damaged or rotting, you may need to remove it as well. Use a pry bar to gently pull it away from the wall, ensuring it does not damage the surrounding area.
Step 2: Inspect and Repair the Frame
Once the old door is removed, inspect the frame for any damage. If you notice rot or structural issues, address them before proceeding. This may involve repairing or replacing sections of the frame to ensure a solid foundation for the new door.
Step 3: Prepare the New Door
Before installing the new door, check that it fits properly in the frame. If necessary, trim the edges using a utility knife to ensure a snug fit. Next, install the door hardware, including the lock and handle, according to the manufacturer’s instructions.
Step 4: Install the Door
With the new door prepared, it’s time for installation:
Step 5: Insulate and Seal
To enhance energy efficiency, add insulation around the door frame. This step is critical in preventing drafts and maintaining a comfortable indoor climate. Use weather stripping to seal gaps, ensuring a snug fit. Finally, apply caulk to any exposed seams to further prevent air leakage.
Step 6: Final Touches
Once the door is installed, give it a final inspection. Check that all hardware is secure and that the door operates smoothly. If desired, paint or stain the door to match your home's aesthetic.
Choosing a Reliable Supplier
While upgrading your entry door is a significant project, sourcing materials from a reliable patio door supplier can make the process easier. Look for suppliers that offer a variety of styles and materials, as well as competitive pricing. Reading customer reviews and seeking recommendations can help you find reputable suppliers in your area.
Conclusion
Investing in entry door installation is a rewarding project that can significantly enhance your home’s aesthetic appeal, energy efficiency, and security. By following the tips outlined in this blog, you can ensure a seamless installation process that results in a beautiful and functional entryway.


Steel entry doors are the perfect alternative for your property.
They are bold, beautiful, durable and strength efficient.In addition, it also contributes for your house's electricity performance and keeps your own home secure.The front door of any domestic is an vital characteristic for 3 reasons; it's miles a important aspect influencing a domestic’s safety and its insulation.Here we discussed the three major benfits of a good Entry door installation in your home.1 SecurityMost people input their home thru the front door, it simply so happens that is also the maximum common way that intruders break-in.
If Your Old Door Is Weak And Of poor Quality, This Does not do much in the way of protection.
A new, stable the front door is probably the first step to securing your own home when you have an older Connecticut domestic with an vintage door that you don’t need to break with a new lock system.2.Energy EfficientNot most effective will your private home be safer with a new front door, it is going to be more electricity efficient.
An older door is much more likely to have holes or leaks in it, allowing outdoor air to get internal and inner air to get out of doors.
No depend the weather you may be leaking out bloodless or heat air.3.
