


Introduction:
Jumper wires are unsung heroes in the world of electronics prototyping, essential for anyone from hobbyists to professional engineers. These small yet crucial components allow for the quick and easy assembly of circuits on breadboards without the need for soldering. This comprehensive guide will explore the various types of jumper wires, their applications, and tips for choosing and using them effectively in your projects.
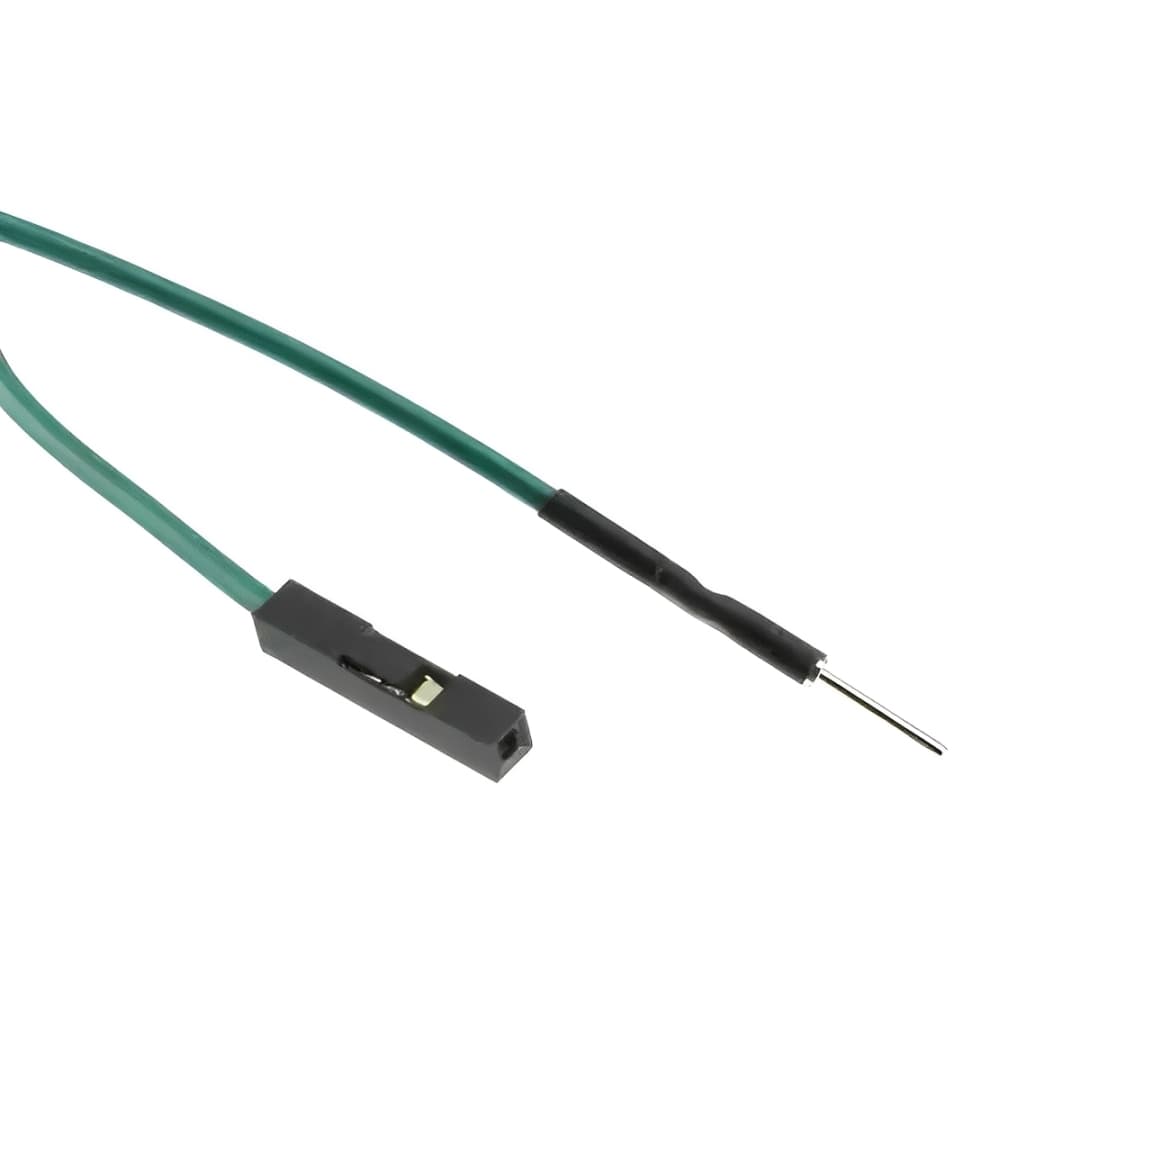
Types of Jumper Wires:
Male-to-Male: These wires have male connectors at both ends, making them ideal for connecting different components on a breadboard or interfacing with female headers.
Female-to-Female: Equipped with female connectors on both ends, these wires are used to link male pins or headers, commonly found in interfacing with hardware like Arduino or Raspberry Pi.
Male-to-Female: These versatile jumper wires are designed to connect male headers to female sockets, facilitating the integration of a breadboard with a microcontroller or other hardware devices.
Materials and Construction:
Jumper wires are typically made from copper wire covered in flexible plastic insulation. The quality of the copper and the precision of the pin manufacture can significantly influence the wire's durability and conductivity. Some high-quality jumper wires also feature gold-plated connectors to resist oxidation and maintain a reliable connection over time.
Choosing the Right Jumper Wire:
When selecting jumper wires for your project, consider the following factors:
- Length: Jumper wires come in various lengths, typically ranging from 4 inches to 12 inches. Select a length that allows you to maintain a neat and organized breadboard setup.
- Connection Type: Choose the type of connection (male-to-male, female-to-female, male-to-female) based on the hardware components you are using.
- Wire Gauge: The thickness of the wire, or gauge, affects its current carrying capacity and flexibility. Thicker wires can handle more current and are less prone to breaking.
Applications of Jumper Wires:
Jumper wires are integral in numerous applications, including:
- Prototyping: Quickly test and modify circuit designs without permanent soldering.
- Education: Teach electronics concepts in classrooms and workshops.
- Testing: Connect and test components individually before finalizing a design.
- Repair: Temporarily replace broken paths in circuits during troubleshooting.
Best Practices for Using Jumper Wires:
To get the most out of your jumper wires and avoid common pitfalls, follow these best practices:
- Avoid Overcrowding: Keep your breadboard neat to prevent accidental shorts and disconnections.
- Check Connections: Ensure that all connections are secure to avoid intermittent faults.
- Organize Your Wires: Use wires of different colours to keep track of various signals and voltages within your circuit.
- Inspect Regularly: Check your jumper wires for any signs of wear or damage and replace them as needed.
Creative Projects Using Jumper Wires:
Explore the versatility of jumper wires with these creative project ideas:
- LED Light Show: Create a dazzling light display by connecting a series of LEDs and controlling them with a microcontroller.
- Temperature Sensor: Use jumper wires to connect a temperature sensor to your microcontroller, allowing you to monitor environmental conditions.
- Home Automation: Build a basic home automation system by using jumper wires to interface sensors and actuators with a central controller.
Conclusion:
Jumper wires are invaluable tools in the field of electronics, providing flexibility and ease of use in prototyping and testing. By understanding the different types of jumper wires and how to use them effectively, you can significantly enhance your electronic projects. Whether you are a student, a hobbyist, or a professional, mastering the use of jumper wires will help you bring your innovative ideas to life with precision and efficiency.


We are Adore Models, a modeling agency in Mumbai designed to cater to actors and models alike.
We groom our male & female models with master classes on-ramp walking, workshops on acting, and curate photo shoots for their pro portfolio to help them bloom and grow into the professional models they can truly be.
The individuality of each male and female model actor is recognized as an asset to their career.
We assess their personalities, aesthetics, vibes, traits, quirks, and talents that they’re comprised of & then work together to target brands, target sectors and labels for the model.

Welcome to Avalon Day Spa, where we strive to satisfy all your body care essentials.
One of the best body massage extension in Chandigarh.
Male to female, get the full body massage from the best spa in Chandigarh at an affordable price.
Come join a luxury body spa in Chandigarh indulge in the ultimate massage experience.
We aim to provide more than just a relaxing massage, a luxurious body spa ambiance with world-class spa services.
To view know more info visit at:- https://avalondayspa.in/