



Car batteries are essential for ensuring your vehicle operates smoothly. Over time, batteries lose their charge capacity, leaving you with a vehicle that struggles to start. If you’re experiencing problems like dimming lights or a sluggish engine start, it might be time for a battery change. Replacing a car battery is a relatively simple process that you can do yourself with some basic tools and a little bit of patience. In this step-by-step guide, we’ll walk you through everything you need to know to replace your car battery safely and efficiently.
Step 1: Gather Your Tools and Materials
These basic tools will allow you to safely remove the old battery and install the new one. It’s essential to use the right type of battery for your vehicle, so be sure to consult your car’s manual for the recommended specifications.
Step 2: Turn Off Your Vehicle and Disconnect the Key
The first step in replacing your car battery is to ensure your vehicle is turned off. This means turning the engine off, removing the keys, and ensuring no electrical systems are running. In some cars, it may be advisable to disconnect the negative cable of the battery before performing any work on the electrical system to prevent any accidental shocks or short circuits.
Step 3: Locate the Car Battery
In most vehicles, the car battery is located under the hood, but in some cars, it may be in the trunk or under the rear seats. If you’re unsure of where the battery is located, refer to your vehicle's manual or consult an online resource. Once you've located the battery, ensure the area is clear of any tools, dirt, or debris to prevent accidental damage or dirt entering the battery terminals during removal.
Step 4: Disconnect the Negative Terminal First
The next step is to disconnect the battery terminals. Start with the negative terminal (marked with a minus sign or "NEG"), as it is safer to remove first. Use your wrench or socket set to loosen the nut holding the negative cable in place. Once the terminal is loose, carefully pull it off the battery post and move it to the side, away from the battery.
Disconnecting the negative terminal first minimizes the risk of accidental electrical shorts when you are working with the positive terminal.
Step 5: Disconnect the Positive Terminal
Next, proceed with disconnecting the positive terminal (marked with a plus sign or "POS"). As with the negative terminal, use your wrench or socket to loosen the nut and remove the cable from the battery post. Be careful not to allow the positive terminal to touch any metal surfaces or the negative terminal, as this could cause a short circuit.
Step 6: Remove the Old Battery
Now that both terminals are disconnected, it’s time to remove the old battery. Some vehicles have a battery hold-down bracket that secures the battery in place, so you may need to loosen or remove this bracket using a wrench or socket set. Once the battery is free, carefully lift it out of the vehicle. Car batteries can be heavy, so it’s important to lift with your legs and not your back to avoid injury.
Step 7: Clean the Battery Tray and Terminals
Before installing the new battery, take a moment to clean the battery tray and the terminal connections. Use a battery terminal cleaner or a wire brush to remove any corrosion or dirt buildup. Corrosion on the terminals can prevent a solid connection, leading to electrical issues down the road. Cleaning the area thoroughly ensures the new battery will work efficiently and have a long lifespan.
Step 8: Install the New Battery
Once the area is clean, carefully place the new battery into the battery tray. Make sure the terminals are positioned correctly, with the positive terminal on the left and the negative terminal on the right. If your vehicle has a battery hold-down bracket, reinstall it to secure the battery in place.
Step 9: Reconnect the Positive Terminal First
Start by reconnecting the positive terminal (marked with a plus sign). Place the cable back onto the positive battery terminal and tighten the nut with your wrench or socket set. Be sure the connection is secure but not over-tightened.
Step 10: Reconnect the Negative Terminal
Now, reconnect the negative terminal (marked with a minus sign). Again, tighten the nut with your wrench, ensuring a snug connection. Once both terminals are securely attached, double-check that there is no movement in the cables and that the terminals are fully connected.
Step 11: Test the New Battery
After securing the battery, it’s time to test your work. Turn the ignition key and start the vehicle. If the engine starts smoothly and the lights are bright, you’ve successfully completed the battery change. If the car doesn't start, double-check that the terminals are tightly connected and that the new battery is functioning properly.
Step 12: Dispose of the Old Battery Properly
Car batteries contain harmful chemicals and metals that can be hazardous to the environment. Many auto parts stores will take your old battery for recycling, so be sure to dispose of it properly. Some locations may offer a credit or discount when you return your old battery, so it's always a good idea to ask.
Conclusion
Replacing a car battery doesn’t have to be a complicated or expensive process. By following this step-by-step guide, you can easily swap out your old battery and get your car back on the road without the need for professional assistance. However, if you’re not confident in performing the battery change yourself or if you run into any issues during the process, you can always rely on a mobile mechanic to handle the replacement for you. Mobile mechanics offer the convenience of having a professional come to your location, saving you time and hassle while ensuring the job is done right.

Want a step-by-step guide to Canon TS3122 troubleshooting online, Then no look further.
Visit the Printer customer service website in order to resolve the Canon TS3122 troubleshooting issues over the phone or chat.
Our experts assist you 24/7 across the globe without pay extra charges.
For more help call us at US (855) 968-1096 UK (800) 368-8615
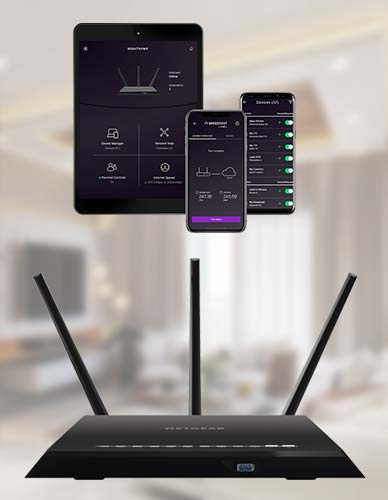
Get a step-by-step guide to Nighthawk app download from the Nighthawk App Download website.
Which provides you the setup instructions to log in to your router to connect to the Internet.
For more information visit our website.

In this quick guide, you’ll find a list of articles & resources we’ve created to guide you through your Kickstarter crowdfunding journey.
Click here to know more about us!