


Imagine investing hundreds—if not thousands—of dollars into a top-tier home security system, only to have a break-in occur in a blind spot. Sounds like a nightmare, right? The truth is, camera positioning matters just as much as the camera’s quality itself. Whether you're protecting your family, valuable possessions, or your peace of mind, knowing where to place cameras during installation is key to maximizing security effectiveness.
In this guide, we'll walk you through the best locations, common mistakes, professional tips, and essential FAQs to ensure your home is fully covered. Let’s build your security fortress, one camera at a time!
Why Camera Positioning Matters
Effective Surveillance: The Difference Between Prevention and Aftermath
Security cameras aren't just passive observers. Their presence can actively deter criminal behavior when placed strategically. Poorly positioned cameras, on the other hand, can leave glaring vulnerabilities that intruders might exploit.
Key Benefits of Proper Placement:
Crime Deterrence: Visible, well-placed cameras discourage potential burglars. Evidence Collection: Capturing clear, actionable footage in case of incidents. Peace of Mind: Knowing you’re comprehensively covered, not just partially.
Key Factors to Consider Before Placement
1. Understand Your Property Layout
Walk around your home, inside and out. Map vulnerable areas—such as entrances, dark corners, and secluded spots—that might invite unauthorized access.
Ask yourself:
Where are the obvious and hidden points of entry? Which areas are least visible from the street or neighbors?
2. Know Your Camera Types and Fields of View
Different home cameras installation serve different purposes:
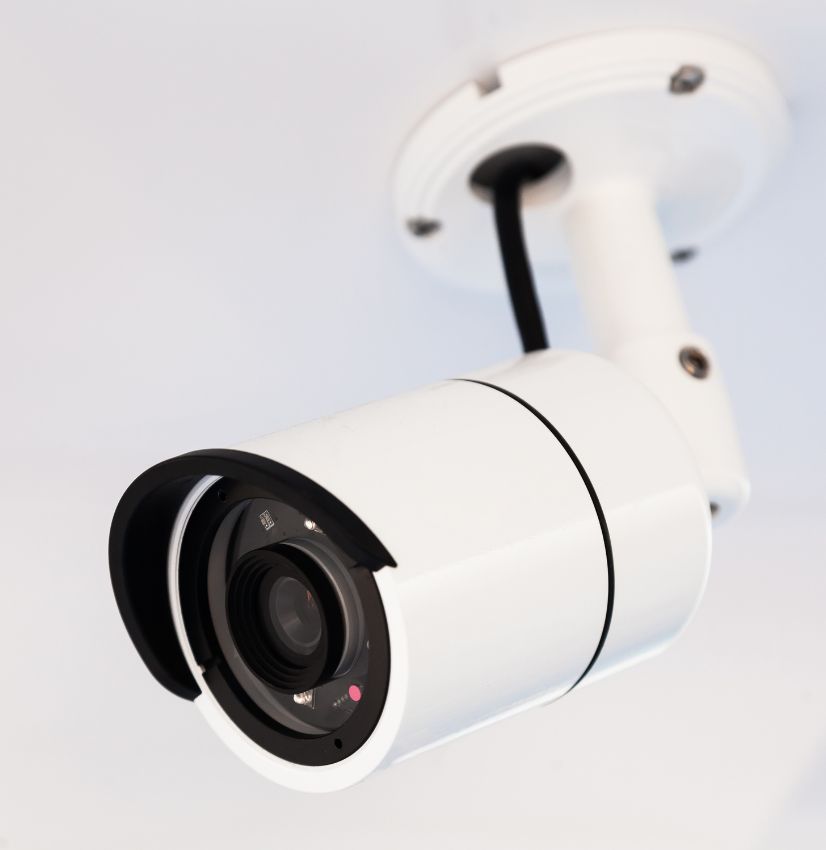
Bullet Cameras: Best for covering long, narrow areas like driveways. Dome Cameras: Perfect for indoor use with wide-angle coverage. PTZ Cameras: Pan, Tilt, Zoom features ideal for large outdoor areas. Knowing your camera's field of view helps minimize blind spots and maximize coverage.
3. Lighting and Environmental Factors
A camera is only as good as its visibility:
Ensure areas have proper daytime lighting or night vision capability. Install weatherproof cameras for outdoor usage (IP65 rating or higher).
Best Locations to Position Cameras During Home Installation
1. Front Door: Your First Line of Defense
You might think burglars sneak around the back—but statistics show that 34% of burglars enter through the front door.
Placement Tip:
Position the camera slightly above door level, angled downward.
Avoid direct exposure to sunlight to prevent glare.
Consider pairing your camera with a smart video doorbell for two-in-one functionality.
2. Back Door: The Forgotten Entry
Secondary entrances are often less monitored, making them a favorite target.
Placement Tip:
Use weather-resistant cameras. Ensure motion-activated lighting supports visibility at night.
3. Garage and Driveways
Garages store valuable tools, bikes, and even provide access into your home. Driveways expose your vehicles.
Placement Tip:
Install cameras covering both the garage door and driveway entry points. Monitor deliveries and visitor parking.
4. First-Floor Windows
Windows facing alleys or secluded spots are common break-in points.
Placement Tip:
Position cameras at an angle that covers multiple windows if possible. Consider indoor cameras facing these windows for an additional layer.
5. Backyard and Side Gates
Backyards often provide unseen entry points.
Placement Tip:
Install cameras near back fences, sheds, and any gates. Opt for wide-angle lenses to capture broader areas.
6. Main Indoor Hallways
Once inside, intruders usually pass through main hallways.
Placement Tip:
Install cameras facing entryways to bedrooms, living rooms, and offices. Motion-activated indoor cameras help preserve storage space.
Common Mistakes to Avoid When Positioning Cameras
1. Ignoring Blind Spots
Every home has tricky corners or hidden angles. Pro Tip: Always perform a live view test and adjust camera angles accordingly.
2. Installing Cameras Too High or Too Low
Golden Rule: Mount outdoor cameras 8–10 feet above ground.
Too high = unclear footage. Too low = easy tampering.
3. Overloading on Outdoor Coverage Only
Interior cameras are crucial to catching any intruder who makes it past external barriers.
4. Failing to Comply with Privacy Laws
Ensure cameras don’t invade neighbors’ private spaces or record public sidewalks extensively. Always respect local privacy regulations.
Expert Tips for the Perfect Camera Setup
1. Blend Visible and Hidden Cameras
Visible cameras deter; hidden cameras collect undisturbed evidence.
2. Integrate Motion Detection
Save bandwidth, battery life, and storage by enabling motion-based recording.
3. Use Cameras with Smart Alerts
Modern cameras can detect people, animals, and vehicles separately, sending smarter alerts to your phone.
4. Regular Testing and Maintenance
Check footage monthly. Clear lenses, replace batteries (if applicable), and adjust settings as seasons change.
Maintaining and Adjusting Your Camera System
1. Seasonal Adjustments
Snow, fallen leaves, and growing vegetation can obstruct views. Regularly trim plants and check angles.
2. Firmware Updates
Manufacturers frequently update cameras to improve security and functionality. Stay updated!
3. Reassess Your Coverage Annually
As your property changes—new gates, pets, or garden sheds—your camera layout may need updating too.
Conclusion
Positioning your home security cameras correctly isn't just a technical step—it’s a strategic defense against threats. By identifying key entry points, understanding your equipment, and continuously refining your setup, you create a nearly impenetrable security network.
Remember: Visibility, angle, height, and overlap are your best friends when it comes to installation.
Start planning today, because peace of mind is truly priceless.
FAQs
Q1. How high should I mount my security cameras?
Answer: Mount cameras 8–10 feet above the ground. This height prevents tampering while maintaining clear visibility of faces and license plates.
Q2. Is it better to have visible or hidden security cameras?
Answer: Both have advantages. Visible cameras deter criminals, while hidden cameras can secretly collect evidence during suspicious activities.
Q3. Can I install cameras indoors and outdoors myself?
Answer: Yes, many modern camera systems are DIY-friendly. However, for complex multi-camera systems, hiring a professional installer is recommended.
Q4. How many cameras should a typical home have?
Answer: Most homes need 4–8 cameras: covering all entry points (doors and windows), driveways, garages, and critical indoor areas like main hallways.
Q5. How can I make sure there are no blind spots?
Answer: Overlap your cameras' fields of view slightly. Perform walkthrough tests to ensure there are no hidden areas.
Q6. Do I need night vision capabilities?
Answer: Absolutely. Night vision ensures your property remains monitored even in complete darkness, reducing risks of nighttime intrusions.
Q7. What is the best angle for a front door security camera?
Answer: Position slightly above the door, angled downward between 15–30 degrees, capturing faces without excessive distortion.
Q8. What features should I prioritize when buying outdoor cameras?
Answer: Look for weatherproof ratings (IP65+), full HD (1080p or higher), motion alerts, infrared night vision, and two-way audio capabilities.
Q9. Can I point a camera at the street?
Answer: Cameras can monitor public areas like streets, but ensure they don't focus invasively on private property (e.g., neighbors’ windows or yards).
Q10. Should I back up my footage?
Answer: Yes! Cloud storage or external hard drives ensure you have copies of critical footage in case the camera or recording device is stolen or damaged.


Futhermore , you will came to know about the various places where you can keep Buddha statue in your home for better results.LIVING RoomIf you want to feel the full advantages of positivity by Lord Buddha, you can place it in a living room.
So it spread peaceful energy that helps to remove negativity between relationships.ENTRANCE DOORThere are many types of statues of Buddha with different meaning.like when Buddha raised his hand it represents to come out of fear and live life with courage .
So, we can place this statue at the welcoming area of home to show the blesses as well.IN THE GARDENApart from this, you can use Buddha statue at home in your garden .Garden is the only place where one can enjoy the beauty of nature.
If you keep Buddha statue in the corner of garden it will enhance relaxation level and take relief from busy Buddha in a classic posture is also significant.
When Buddha holds one hand upward and other hand in downward direction it shows the blessings of lord Buddha and if we keep this statues in indoors then it will create a warmth atmosphere in home .
On the other hand it will spread happiness everywhere.MEDITATING PLACEGenerally, The serene Buddha statue provides spiritual enlightenment and it will bless you with happiness and wealth also.

