


Vinyl floors are a popular substitute for hardwood floors in homes because they can imitate the appearance of both materials and are quick, easy, and inexpensive to install. Additionally, vinyl floor care is quite simple because vinyl is the easiest floor type to install and maintain.
But ultimately, it will require repairs, just like any other kind of flooring. From little scratches and cracks to more serious damage, this thorough guide to vinyl flooring repair in your house will assist you in taking care of any necessary repairs. You may quickly restore your vinyl flooring to its original appearance and solve any problems with it with the correct equipment and supplies.
Typical reasons why vinyl flooring becomes damaged:
Vinyl flooring is not fully impenetrable to harm, but it can tolerate heavy foot activity and routine cleaning. Vinyl flooring can sustain damage from a number of typical sources, such as:
1. Abrasion and scratches:
Even while they won't harm the vinyl's surface, abrasions and scratches can let dirt and grime seep into the flooring and result in further damage.
2. Gouges and stains:
With the right cleaning solutions and equipment, tiny stains and gouges can be eliminated, but bigger stains may penetrate the substrate and leave lasting marks.
3. Intact or ripped flooring:
Another way that tears in vinyl flooring can harbour bacteria and germs is by trapping dirt and filth beneath the flooring.
4. Extensive cuts and burns:
Deep burns and gouges can be very difficult to remove; new flooring or possibly a subfloor repair may be necessary.
5. Damage from water:
One of the hardest damage kinds to fix is water damage, which may need removing the subfloor and vinyl flooring entirely.
How to fix minor scratches and cracks:
If minor scratches and cracks in vinyl flooring are not in high foot traffic or moisture-prone areas, they are quite simple to fix. If the crack is little, you can carefully use acrylic caulk to fill it, being sure the caulk covers the entire fissure. You might use a crayon or marker the same colour as your flooring to fill up any scratches. To remove any remaining colour after filling the crack or scrape, buff the area with a soft cloth. Cleaning the area properly will ensure that any dirt or grime that may have developed in the crack or scrape is eliminated.
How to fix ripped or loose vinyl flooring:
It's best to fix the current flooring rather than just adding new vinyl to the affected area if your vinyl flooring is ripped or loose. Starting with removing the damaged flooring, you need to thoroughly clean the area to get rid of any filth or grime that could still be there. You should replace the subfloor if it is damaged before installing new vinyl flooring. Use the same pattern and colour for the new vinyl flooring as you did for the old flooring once the subfloor is clean and dry. Opt for a flooring roller and tightly press the vinyl floor into place.
How to repair burns and deep gouges:
The subfloor may need to be replaced together with the damaged vinyl if your vinyl flooring has severely burned or gouged the surface. The space can be prepared for new vinyl flooring by washing and drying it. Make sure the design and colour complement the flooring that is already in place. Use a piece of wood to cover the damage if it's close to a doorway. Your floor will continue to look great while being sealed against bacteria and debris.
How to fix damage from water:
Consider using the following do-it-yourself flooring restoration technique if you have some water-damaged vinyl flooring and not enough flooring left to replace the entire affected area:
To get as much dirt out of the damaged flooring as you can, you should hoover it. After the dirt is gone, combine one part white vinegar and two parts water in a container that can be sealed. After inserting the damaged vinyl flooring portion into the container, cover it with the lid. After letting the vinyl flooring soak in the mixture of vinegar and water for fifteen minutes, blot it dry.
How to replace your vinyl floors:
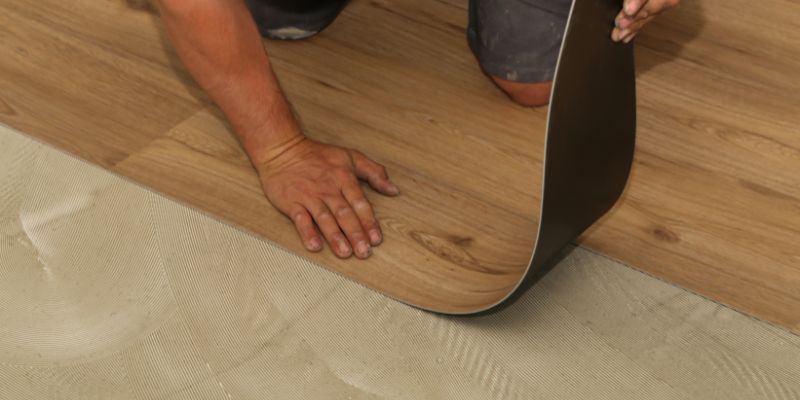
If your vinyl is beyond repair, you should consider getting a new floor. For instance, if there are obvious rips in different places on your floor, a replacement is required. Alternatively, if water damage to your floor has left it more prone to rips. On the other hand, installing vinyl flooring is not too difficult.
1. Using a scraper, begin by removing your old vinyl, cutting it into little strips, and pulling away from the corner to separate the flooring from the glue. It's recommended to pre-heat the area with a heat gun or even a hairdryer for more tough regions. This causes the glue to become softer and more compliant.
2. After reaching your subfloor, give it a good cleaning by sweeping out any dust or debris and letting it dry for at least 24 hours. During this time, remove the new vinyl from its packing and give it time to adjust.
3. When you're ready, measure the size of your room and cut your new vinyl accordingly, adding 15 cm on either side for safety.
4. Lay on the floor after that. The size of the room determines the installation technique. Simple loose installation without glue is sufficient for smaller rooms. Double-sided tape is recommended for rooms of between 12 and 25 square meters; it is available in our Adhesive Section. Apply glue to the subfloor before laying in larger rooms.
5. Apply beading with a hammer and nail or glue to finish.
Suggestions for effective vinyl flooring repair:
There are a few easy things to remember while repairing vinyl flooring to make sure the job is done correctly.
-Employ appropriate tools:
Before starting any repairs, make sure you have the right cleaning and cutting instruments and that they are clean and sharp.
-Select the appropriate adhesive:
Make sure the adhesive you're using for your repair is the appropriate kind. Make sure you adhere to the usage guidelines.


