


ampedextender setup

0

0

2


Follow the steps below to set up your Amped Wireless extender:
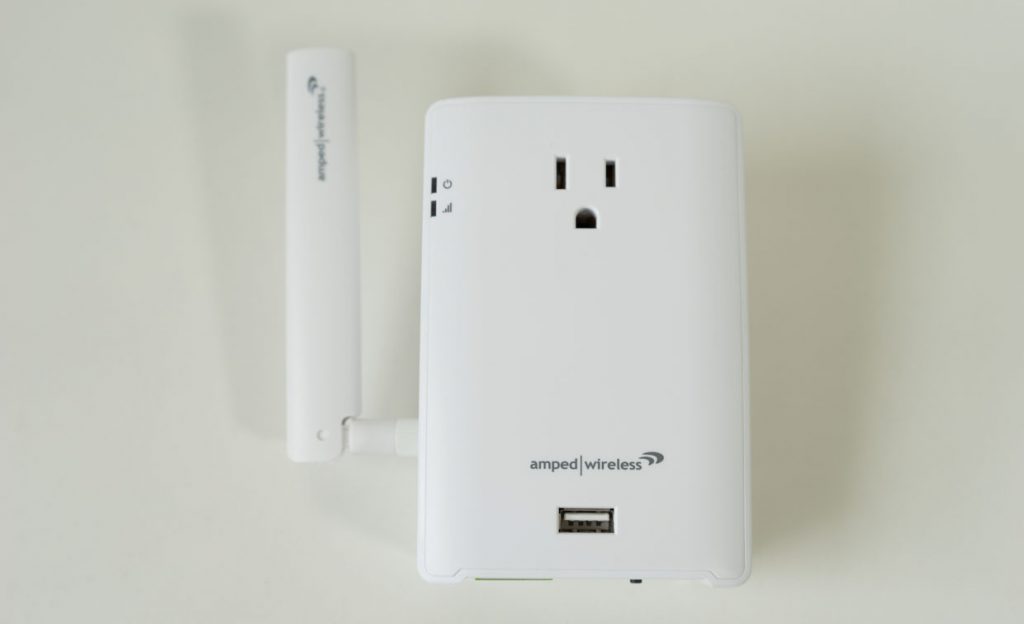
- Connect your Amped Wireless Range extender to the power outlet. You will see a new WiFi network on your computer screen with the name of Amped_<model name>. Click on the CONNECT button.
- When prompted with a dialog box asking if you wish to set up the router or not. Click on NO, JUST CONNECT.
- Open the web browser on your computer. Type http://setup.ampedwireless.com in the address bar. If it doesn’t open, use http://192.168.1.240 or http://192.168.3.1, also the default IP address to access the Amped wireless extender setup page.
- If you still face issues connecting to the wizard through the address, use an Ethernet cable and try making the connections again.
- Click on the dashboard button, and click on Scan to find networks available. A list of available networks will appear on the screen.
- From the list, select the one that you need to extend. A new window will appear asking you to enter the router credentials. Click on the Next button.
- Enter the Network ID or the Security key.
- Click on Clone Settings to use the same login credentials.
The router will restart and the setup process will be complete.
0
0
2
ampedextender setup
Related Articles

As technology advances and more people get online, internet service providers are preparing for a busy year. Perks of CenturyLink internet Price for lifeCenturyLink Internet is a company that provides internet service. The most expensive plan is the CenturyLink Premier Plus which costs $300 per month. The cheapest plan offered by CenturyLink is the CenturyLink Basic which costs $25 per month. Other FeaturesData caps or limitsData caps or limits are a common practice in the internet plans.
0
0

Don't miss out on all the great programming available with CenturyLink cable! In fact, you can access over 120 different streaming TV channels right from your computer or mobile device. No contract, cost-effective & customizableCenturyLink is a leading telecommunications provider with a wide range of CenturyLink cable channels. If you're thinking about ordering TV service from CenturyLink, you may be wondering if you can get a special deal. In addition to getting a great selection of channels, you can also save money by signing up for CenturyLink's TV service.
0
0

How to Find CenturyLink Internet Service? There are many ways you can find CenturyLink Internet Service in your area. If you are looking for CenturyLink Internet Service in Deltona, you should give them a call at (855) 561-1333. How to get CenturyLink High-Speed InternetCenturyLink High-Speed Internet is among the largest broadband internet providers in the United States. ConclusionCenturyLink offers a variety of internet services, including CenturyLink High-Speed Internet, CenturyLink Internet, and CenturyLink Wireless.
0
0