


Clean silicone sealant looks better and contributes to the overall cleanliness and hygiene of your home. It ensures that your bathroom, kitchen, and other areas where sealant is used look fresh and well-maintained.
Preparation Before Cleaning:
Assessing the Condition of the Sealant
Before you start cleaning, check the sealant for any signs of damage or deterioration. If the sealant is cracked or peeling, it might be time to replace it instead of just cleaning it.
Protecting Surrounding Areas
Cover nearby surfaces with plastic sheets or masking tape to prevent any cleaning solution from causing damage.
Step-by-Step Cleaning Process:
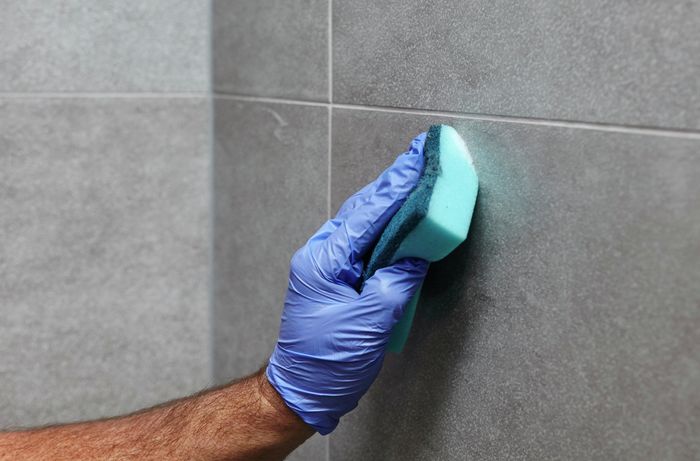
Removing Loose Debris
Start by wiping the sealant with a dry cloth to remove any loose dirt or debris.
Applying a Cleaning Solution
Mix a few drops of mild detergent with warm water. Apply this solution to the silicone sealant using a soft-bristle brush or sponge.
Scrubbing the Sealant
Gently scrub the sealant to remove dirt and grime. For best results, let the cleaning solution sit for a few minutes before scrubbing.
Dealing with Stubborn Stains:

Using Vinegar and Baking Soda
For tough stains, create a paste using vinegar and baking soda. Apply this paste to the stained areas and let it sit for about 15 minutes before scrubbing.
Applying Commercial Cleaners
There are specialized silicone sealant cleaners available on the market. Follow the manufacturer's instructions for best results.
Maintaining Clean Silicone Sealant:
Regular Cleaning Schedule
To keep silicone sealant in top condition, clean it regularly. A monthly cleaning schedule is recommended for areas exposed to moisture.
Tips to Prevent Future Stains
Keep the areas dry and well-ventilated to prevent mold and mildew growth. Wipe down the sealant after each use in wet areas.
Common Mistakes to Avoid:
Using Harsh Chemicals
Avoid using bleach or other harsh chemicals that can damage the silicone. Stick to mild cleaners and natural solutions.
Ignoring Safety Precautions
Always wear protective gear when cleaning to prevent skin irritation and eye injuries.
Removing Old Silicone Sealant:
When and Why to Remove Old Sealant
If the silicone sealant is beyond cleaning due to mold, mildew, or damage, it needs to be removed and replaced.
Step-by-Step Removal Process
- Cut along the edges of the old sealant with a utility knife.
- Use a sealant remover tool to peel away the old sealant.
- Clean the surface thoroughly before applying new sealant.
Replacing Silicone Sealant:
Choosing the Right Sealant
Select a sealant that matches the requirements of the area you're working on. Consider factors like moisture exposure and material compatibility.
Application Tips
Apply the new sealant smoothly using a caulking gun. Ensure even distribution and smooth the surface with a damp finger or tool.

Special Considerations:
Cleaning Silicone Sealant in Bathrooms
Bathrooms are prone to mold and mildew due to high humidity. Use vinegar and baking soda regularly to keep the sealant clean.
Kitchen Silicone Sealant Cleaning
Kitchen sealant can get greasy. Use a mixture of warm water and dish soap to tackle grease and grime.
Eco-Friendly Cleaning Options:
Natural Cleaning Solutions
Vinegar, baking soda, and lemon juice are excellent natural cleaners that are effective and environmentally friendly.
Reducing Environmental Impact
Use biodegradable cleaning products and avoid chemical cleaners to minimize your environmental footprint.
Professional Cleaning Services:

When to Hire a Professional
If the sealant is heavily stained or damaged, or if you're unsure about the cleaning process, it might be best to hire a professional.
What to Expect from Professional Services
Professional cleaners will use specialized tools and products to clean or replace the silicone sealant, ensuring a high-quality finish.
Conclusion:
Keeping silicone sealant clean is essential for maintaining its functionality and appearance. By following the steps outlined in this guide, you can ensure your sealant remains mold-free and looks great. Regular cleaning, using the right tools and materials, and knowing when to replace old sealant are key to effective maintenance.
FAQs:
1. How often should I clean silicone sealant?
It's best to clean silicone sealant once a month, especially in high-moisture areas like bathrooms and kitchens.
2. Can I use bleach to clean silicone sealant?
It's not recommended to use bleach as it can damage the silicone. Stick to milder cleaning solutions like vinegar and baking soda.
3. What should I do if the silicone sealant is moldy?
For moldy sealant, use a mixture of vinegar and baking soda to clean it. If the mold persists, you may need to replace the sealant.
4. Is it necessary to remove old sealant before applying new sealant?
Yes, old and damaged sealant should be removed to ensure proper adhesion and effectiveness of the new sealant.
5. Can I hire professionals to clean silicone sealant?
Yes, professional cleaning services are available if you prefer expert help or if the sealant is heavily stained or damaged.


