


Starting a roofing project, especially a roof replacement, can be overwhelming, particularly for first-timers. It's a significant construction undertaking that occurs directly above your home, involving considerable mess, safety equipment, and noise.
Many homeowners who contact Surface Roofing feel nervous about the process. Common questions include: “How long will it take?” “Will my belongings be damaged?” “How should I prepare?” and today’s focus: “What does the roof replacement process look like?”
In this blog, we’ll break down:
The steps of an asphalt shingle roof installation
Step 1: Tearing off the old roof
The first step in installing a new roof is removing the old one. This includes all old shingles and other materials like flashing, underlayment, and nails.
Your roofing contractor should protect your property before starting this process, using tarps to cover sensitive areas of your home and yard, delivering a dumpster for old materials, and using wooden boards to protect items like your garden and air conditioning unit.
The tear-off usually begins early in the morning and can take several hours, depending on the roof's size and complexity.
Step 2: Inspecting & replacing roof decking
After tearing off the old roof, the contractor will inspect the roof decking to ensure it’s in good condition. Roof decking is the layer of wood that attaches roofing materials to the building's frame. If damaged, the contractor will replace the wood with new plywood or oriented strand board (OSB), providing a stable base for the new roof.
OSB is commonly used for roof decking today due to its strength, durability, and affordability.
Step 3: Installing drip edge
The next step is installing a drip edge along the roof's eaves and rakes. A drip edge is metal flashing installed along roof edges to prevent water from running under the shingles and seeping into the decking. Materials for drip edges include aluminum and PVC.
Step 4: Covering the roof decking with underlayment
Once the drip edge is installed, the next step is covering the roof decking with underlayment. Underlayment is a water-resistant barrier providing extra protection against water damage. Common materials include felt paper and synthetic underlayment made from fiberglass or polyester.
Synthetic underlayment is lighter and tougher than felt paper, making it easier to install and walk on without tearing.
Step 5: Using a leak barrier to waterproof valleys
In areas where two roof planes meet, like a valley, a special leak barrier is installed to prevent water from seeping under the shingles into the decking. Options include self-adhesive membranes and metal flashing.
These membranes provide additional protection in areas with prolonged water exposure, such as valleys, around penetrations, and on lower-slope roofs. Most major roofing brands require leak barriers in these areas for their contractor workmanship warranty.
Step 6: Getting started with starter shingles
After installing the underlayment and leak barrier, it’s time to lay the shingles, starting with starter shingles. These provide a secure base for the rest of the shingles and can be made from materials like asphalt and fiberglass.
Starter shingles are designed to sit flat on the roof, allowing water to run off easily and providing a sticky base to prevent wind from blowing up under the first line of shingles.
Step 7: Flashing the walls and penetrations
Flashing is installed around walls and other penetrations, such as chimneys and vents, to prevent water from seeping in. Flashing materials include metal and rubber, installed using different methods depending on what and where they’re protecting.
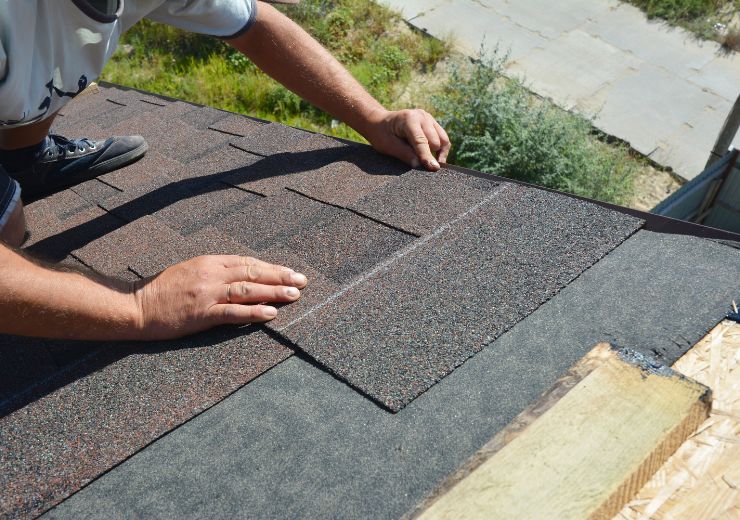
Step 8: Install your chosen shingles
With all protective materials in place, it’s time to install the replacing roof shingles. There are many types of shingles, including asphalt, metal, and tile. Asphalt shingles are the most common and come in various colors and styles.
Today, architectural shingles, which are two-ply and have more dimension, are more common than the flatter three-tab shingles used in the past. Luxury shingles, designed to look like slate or shake roofs, are heavier and more expensive.
Step 9: Finish it off with Ridge cap shingles
After installing the main layer of shingles, finish the roof with ridge cap shingles, which cover the ridge where two roof planes meet. They come in various colors and styles to match the main shingles.
Step 10: Clean up the mess
The final step is cleaning up. The contractor will remove all debris, including old shingles, nails, and other materials. They’ll use a blower to ensure the roof is clean, clear out the gutters, and use magnets around your yard to pick up loose nails and debris.
Additionally, the project manager will perform a full inspection once your replacement is complete. They’ll inspect the roof, answer any questions, and ensure the quality meets your expectations.


