


Live streaming is no longer just for gamers or influencers—it’s now one of the most powerful ways to sell products online. With Shopify’s Live Streaming API, you can broadcast directly to your store, letting customers watch, interact, and shop without leaving the page. Pair that with OBS Studio, a free professional-grade streaming tool, and you have everything you need to host your own live shopping events.
Here’s a step-by-step guide to help you set it up.
Step 1: Get Familiar with the Tools
Before connecting anything, let’s clarify the roles of Shopify Live Shopping:
Shopify Live Streaming API – This enables your store to receive and display a live video feed, sync featured products in real time, and track engagement.
OBS Studio – This is your broadcasting hub where you control cameras, audio, overlays, and stream quality.
Think of Shopify as the stage where your audience is and OBS as the control room managing the show.
Step 2: Prepare Your Shopify Store
Log into your Shopify admin and ensure you have access to Live Streaming API settings (you may need an app or custom integration depending on your setup).
Create a live event page or section where the stream will be embedded.
From the Live Streaming settings, copy your RTMP URL and Stream Key. These will link OBS to Shopify.
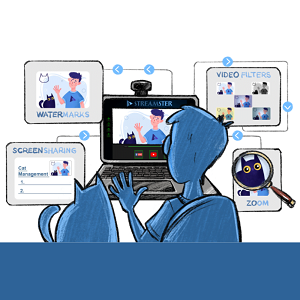
Step 3: Download and Configure OBS Studio
Install OBS Studio from the official site (Windows, macOS, Linux supported).
Open OBS and go to Settings → Stream.
For “Service,” select Custom.
Paste the RTMP URL and Stream Key you got from Shopify.
Save settings.
Step 4: Build Your Streaming Scene
In OBS, you’ll create the “look” of your stream:
Add Video Capture Device for your camera.
Add Audio Input Capture for your microphone.
Insert overlays: brand logos, product banners, and “Tap to Buy” graphics.
Arrange multiple scenes (for example: close-up of a product, full presenter view, or split screen).
A well-designed scene can make your stream look polished and keep viewers engaged.
Step 5: Test Before You Go Live
Use the Preview or Start Recording option in OBS to check audio levels, lighting, and layout.
Ensure a stable internet connection—wired is better than Wi-Fi.
Confirm Shopify is ready to receive the feed by checking API connection status.
Step 6: Start Your Live Shopping Event
Hit Start Streaming in OBS.
Your live video will now appear on your Shopify page.
Showcase products as you talk about them—Shopify’s API can display clickable product links in real time.
Step 7: Interact and Sell
During your live event:
Greet viewers and answer questions as they come in.
Demonstrate products in detail.
Run limited-time offers to create urgency.
Keep energy high—people buy from personalities, not just products.
Step 8: Wrap Up and Review
When the event ends:
Click Stop Streaming in OBS.
Save the recording for repurposing (social clips, YouTube uploads, etc.).
Analyze performance in Shopify—check viewer engagement, sales during the stream, and product click-through rates.
Final Word: By integrating Shopify’s Live shopping platform API with OBS Studio, you combine the power of eCommerce with the creativity of professional broadcasting. This setup allows you to host engaging, high-quality live shopping shows that can turn viewers into loyal customers.


