


There’s nothing more annoying than a dripping faucet keeping you awake at night or adding unnecessary dollars to your water bill. A leaky faucet might seem like a small problem, but over time it wastes gallons of water and can lead to bigger plumbing issues. The good news? You don’t always need to call a plumber to fix it. With a few tools, a bit of patience, and some guidance, you can repair most leaks in less than an hour. And if you ever feel the task is a bit too much, you can always reach out for small plumbing repair services in the USA for professional help.
Understanding Why Faucets Leak
Before you start fixing, it helps to know what causes the drip. Most faucets leak because of worn-out washers, damaged O-rings, or corroded valve seats. Over time, the constant water pressure and mineral buildup can weaken these parts, leading to a steady drip from the spout.
Different types of faucets—like compression, ball, cartridge, or ceramic disk—have different mechanisms. Knowing which one you have will make the repair smoother and prevent you from taking apart more than necessary.
Tools and Materials You’ll Need
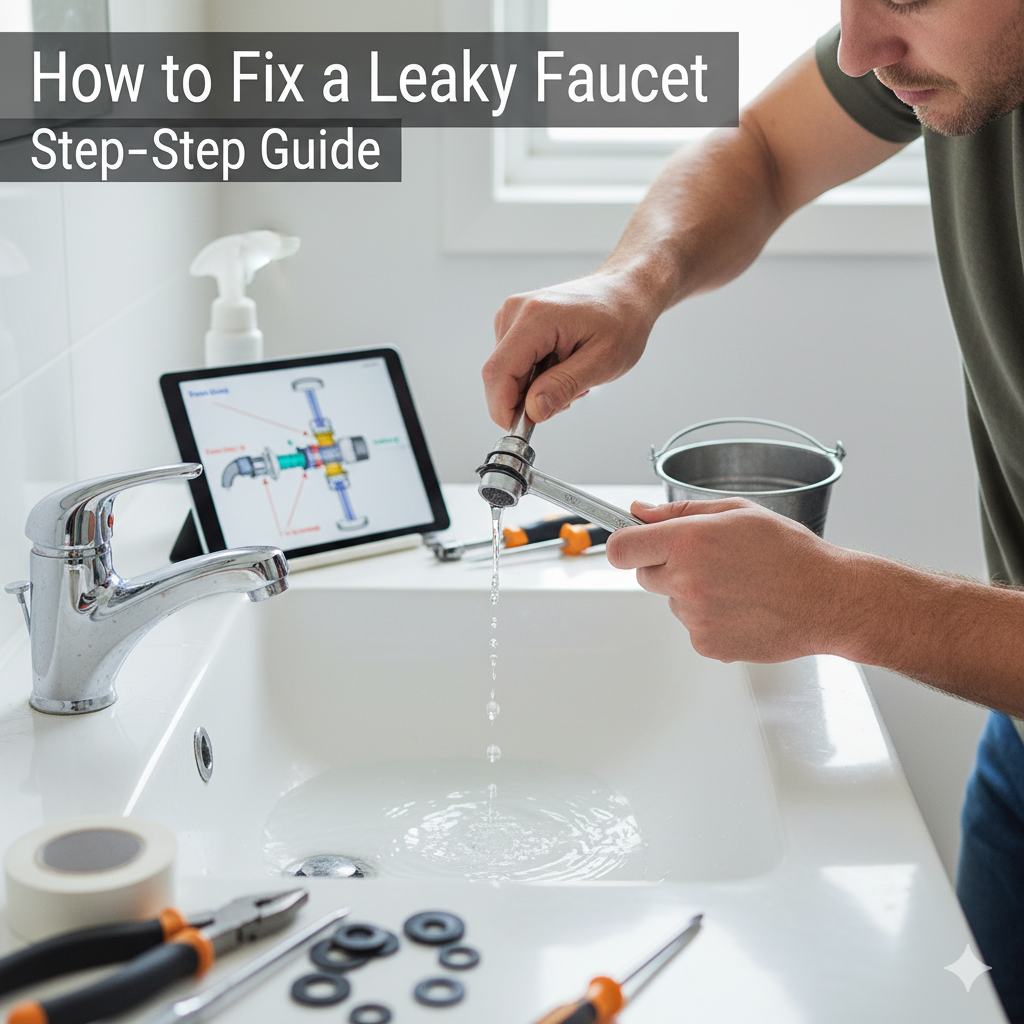
Before you roll up your sleeves, gather the essentials. Having everything on hand will save time and frustration.
Adjustable wrench
Screwdriver (flathead and Phillips)
Pliers
Replacement washers and O-rings
Plumber’s grease
Towels or rags
Small bowl (to keep screws and parts organized)
It’s also smart to take a picture of your faucet before disassembling it. That way, you’ll know exactly how to put it back together.
Step 1: Turn Off the Water Supply
Always start by shutting off the water. Look under the sink for the shut-off valves—there should be one for hot and one for cold water. Turn them clockwise until the water stops flowing. Open the faucet to make sure the water is completely off and to release any pressure in the lines.
If you can’t find the shut-off valves, you may need to turn off the main water supply to your home.
Step 2: Plug the Drain
It may sound simple, but this step is important. Use a sink plug or even a rag to block the drain. This keeps small screws or washers from slipping down the drain while you work.
Step 3: Disassemble the Faucet
Use your screwdriver or wrench to carefully remove the faucet handle. The handle is usually held in place by a small screw—sometimes hidden under a decorative cap. Once the handle is off, you’ll have access to the internal parts like the stem, packing nut, and washer.
Take your time and keep parts in order as you remove them. It’s easy to forget which piece goes where, especially if it’s your first time doing a repair.
Step 4: Inspect the Parts
Check the washer and O-ring closely. If you notice cracks, stiffness, or flattening, they’re likely the source of the leak. Also, inspect the valve seat and faucet stem for signs of corrosion or mineral buildup.
If there’s a lot of white or green residue, that’s limescale from hard water. Clean it gently with vinegar or a soft brush.
Step 5: Replace the Damaged Parts
Take the old washer or O-ring to a hardware store to find an exact match. Faucet parts come in many sizes and styles, and using the wrong one can cause another leak. Once you have the new parts, apply a thin layer of plumber’s grease before reinstalling them. This helps create a better seal and extends their life.
If you have a cartridge faucet, you might need to replace the entire cartridge instead of individual washers. Most cartridges are easy to remove and replace—just make sure to buy the same model.
Step 6: Reassemble the Faucet
Now, put everything back in the same order you removed it. Tighten the parts gently but firmly. Over-tightening can strip threads or crack components.
Once reassembled, remove the drain plug and turn the water supply back on slowly.
Step 7: Test Your Repair
Turn the faucet handle to check if the drip is gone. Let the water run for a few seconds, then shut it off. Watch carefully for any leaks around the base or spout.
If it’s still dripping, you may need to double-check that the washer or O-ring is seated correctly. Sometimes a small adjustment can make all the difference.
Preventing Future Leaks
Fixing a leak is one thing, but preventing it is even better. Here are a few simple habits to keep your faucet in good shape:
Avoid turning the faucet handles too tightly when shutting off water.
Clean around the handles and spout regularly to prevent mineral buildup.
Replace washers and O-rings every few years, especially if you live in an area with hard water.
Consider installing an aerator or water softener to reduce mineral deposits.
Regular maintenance goes a long way in keeping your faucet drip-free.
When to Call a Professional
If you’ve tried everything and the faucet still leaks, the issue might be deeper—such as a damaged valve seat or internal corrosion. In that case, it’s best to call a professional plumber.
A licensed handyman can diagnose the issue quickly and ensure the repair lasts. You can reach out to Magic Touch Handyman for reliable and affordable plumbing repairs across the U.S. They handle everything from minor leaks to complete fixture replacements.
FAQs About Fixing a Leaky Faucet
1. How much water does a leaky faucet waste?
A single drip per second can waste over 3,000 gallons of water in a year. That’s enough to fill a small swimming pool. Fixing it promptly helps conserve water and lowers your utility bill.
2. How do I know what type of faucet I have?
You can usually tell by how it operates:
Compression faucet – has separate handles for hot and cold water.
Cartridge faucet – moves up and down to control flow.
Ball faucet – often found in kitchens, with a single handle that moves in all directions.
Ceramic disk faucet – uses a single lever and has a wide cylinder body.
3. Can I use Teflon tape on a faucet?
Yes, but only on threaded connections. It helps prevent leaks in joints, not inside the faucet itself.
4. What if my faucet leaks from the base instead of the spout?
That usually means the O-ring or seal around the base is worn out. You’ll need to disassemble the faucet and replace it.
5. How often should I replace faucet parts?
It depends on usage and water quality, but replacing washers and O-rings every few years helps prevent leaks before they start.
A Final Thought
Fixing a leaky faucet may seem like a small task, but it’s a satisfying one. You save water, reduce noise, and avoid future plumbing headaches. Plus, you’ll feel a bit of pride every time you turn that handle and hear—nothing.
If you’d rather not get your hands wet or simply want the job done fast, the team at Magic Touch Handyman is always ready to help. Whether it’s a simple drip or a full plumbing repair, they bring skill, care, and attention to every job—so your home stays quiet, dry, and efficient.


We have developed to become one of the main Technical Maintenance Services company in Dubai.
Our significant administrations region included, Electrical services, Plumbing Services, Swimming Pool Repair Services, Air Conditioning Repair Service, Apartment Cleaning Services, Carpentry Services.
It resembles a one-stop arrangement, where you can get all administrations under one rooftop.
Our quality administrations are our responsibilities and a significant justification our client's dependability.
We should walk you through our abilities.Technical Services Company in Dubai was established 2010 and ceaselessly presenting in offering great types of assistance for Electrical, Mechanical, Plumbing, painting, couch cleaning, and others.
Also, we will probably offer the best quality of administrations to our customers.
