


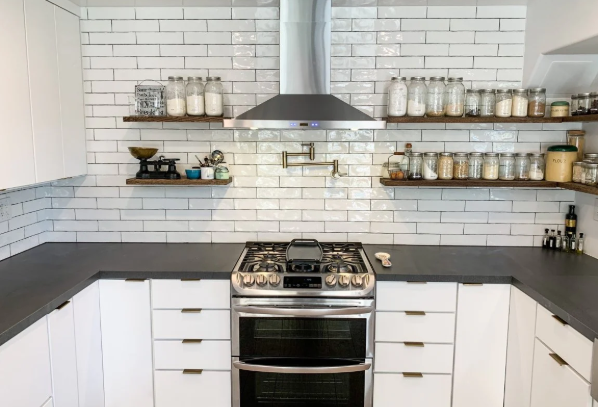
A wall-mounted ductless range hood is a convenient and stylish solution for kitchens where external venting isn’t feasible. Instead of venting air outside, these hoods recirculate it through carbon or charcoal filters, removing odors and some airborne grease. Proper installation ensures optimal performance, safety, and longevity. This guide provides a step-by-step approach to installing a wall-mounted ductless range hood.
Understanding Wall-Mounted Ductless Hoods
Ductless range hoods filter and recirculate air back into the kitchen rather than venting it outside. They are ideal for apartments, rental properties, or kitchens with limited access to exterior walls. Most models include built-in lighting, adjustable fan speeds, and removable filters for easy maintenance.
Tools and Materials You’ll Need
Before starting, gather the following items:
- Wall-mounted ductless range hood
- Measuring tape and pencil
- Screwdriver or drill
- Screws and mounting hardware (included with the hood)
- Wall anchors or studs for secure mounting
- Level
- Electrical wire and connectors (if not pre-wired)
- Safety gear (gloves, goggles)
Having all tools and materials ready ensures a smooth installation process.
Step 1: Measure and Mark
Accurate measurements are crucial for correct placement.
- Height Above Cooktop: Typically, ductless wall-mounted hoods should be installed 24–30 inches above an electric cooktop and 28–36 inches above a gas cooktop.
- Center Alignment: Mark the centerline of the cooktop on the wall to align the hood properly.
- Mounting Points: Mark the positions for screws or brackets using a level to ensure the hood will be even.
Step 2: Prepare the Wall
- Locate Studs: If possible, mount the hood on wall studs for maximum stability.
- Use Anchors: If studs are not available, use heavy-duty wall anchors suitable for your wall type.
- Clear the Area: Remove any obstructions on the wall and ensure the area is clean and level.
Step 3: Install Mounting Brackets
- Most wall-mounted ductless hoods come with mounting brackets.
- Secure the brackets to the wall using screws or anchors.
- Use a level to confirm the brackets are straight before fully tightening.
Step 4: Attach the Range Hood
- Lift the hood carefully and align it with the mounting brackets.
- Secure it using screws provided by the manufacturer.
- Ensure the hood is level and flush with the wall for proper airflow and appearance.
Step 5: Electrical Connection
- Turn off power to the circuit before making any connections.
- Connect the hood’s wiring to the house supply using wire nuts or connectors: black to black (hot), white to white (neutral), and green or bare wire to ground.
- Ensure wires are secured inside the hood’s junction box to avoid contact with moving parts.
Step 6: Install Filters and Covers
- Insert charcoal or carbon filters as instructed by the manufacturer.
- Attach any grease filters, baffle filters, or covers. These components capture grease and particles, helping maintain clean kitchen air.
Step 7: Test the Hood
- Turn on the fan at different speeds to verify airflow and noise levels.
- Test the lighting to ensure proper illumination of the cooktop.
- Make adjustments if necessary for optimal performance.
Maintenance Tips
- Clean Filters Regularly: Wash metal filters monthly and replace charcoal filters every 6–12 months.
- Wipe Surfaces: Keep the exterior free of grease and dust using a soft cloth and mild cleaner.
- Inspect Mounting: Periodically check brackets and screws to ensure the hood remains secure.
- Check Fan Function: Ensure the fan operates smoothly and without unusual noise.
Conclusion
Installing a wall-mounted ductless range hood is a practical solution for kitchens where ducting isn’t possible. By following accurate measurements, secure mounting, proper electrical connections, and careful filter installation, homeowners can enjoy a cleaner, odor-free cooking environment. Regular maintenance, including cleaning and filter replacement, ensures the hood continues to function efficiently while adding style and convenience to your kitchen. Choose Proline Range Hoods for high-quality ventilation that elevates your kitchen. Stylish, efficient, and built to last, our hoods keep your space fresh and comfortable. Enjoy superior airflow and modern design with every cooking session.


