


While LEDs are the preferred type of grow lights amongst cannabis growers, plenty of budding farmers are sticking with HID lights because of their proven track record. HID grow lights have been around for a long time, and they wouldn’t have stuck around if they didn’t get the job done. Far more than serviceable, the right HID light can yield amazing results.
Aside from their tried-and-true reputation, what really makes HID grow lights such an attractive option is their cost. For growers with a strict startup budget, HIDs are a cost-effective option versus LEDs, though the price gap between the two is getting smaller by the year. HID grow lights have equal power and brightness to LEDs, and, for a bit less money, can produce exceptional yields. That’s why many growers have yet to make the switch. As for those that have ditched HIDs for LEDs, they aren’t without their reasons. For one, HIDs put off a lot of heat, and as a consequence, drain a ton of electricity. Because they tend to overheat, cannabis cultivators end up purchasing additional ventilation to keep harsh temperatures from interfering with their grow. HID grow lights also require frequent bulb changes as they only last 10,000 hours, compared to a whopping 50,000 hours that some LED bulbs can offer. That’s about 5.7 years when running 24 hours a day.
HPS or MH Grow Bulbs
High Pressure Sodium (HPS) bulbs emit a yellow-orange-red light, which is ideal for maximizing yields during the flowering cycle, but results in weaker plants if used during vegging.
Metal Halide (MH) bulbs emit a bluer light that makes for strong plant growth during vegging, but produces lower yields during flowering. It is possible to use either of these bulbs on their own throughout the full grow cycle, but your results will be better if you combine the two.
HPS Vs. MH: Which Is Best?
If you want the best results, then you’re going to want both of the types of HID bulbs- HPS and MH. HPS, or High-Pressure Sodium, bulbs are what boost your plants’ yields during the flowering stage. MH, or Metal Halide, bulbs keep plants growing strong during the vegetative stage. You can run both lights at the same time but the cost will be higher because of the additional energy drain. Conversely, you can switch them out accordingly and grow healthy plants just as fast. Just don’t run one or the other throughout the entire grow. HPS alone will only give you mediocre results, while MH will produce the worst yields if used solo.
What Wattage HID Should I Get?
When it comes to wattage, the size of your grow determines how many watts your HID grow light should have. The general rule of thumb is 30 to 50 watts per square foot. For the most efficient range, that is anywhere from 250 and 1000 watts, but the best choice for most growers is typically 400 or 600-watt bulbs. This is because they make it easier to control the heat. A 1000-watt bulb, for example, gets way too hot, and would only be necessary for 16 or more plants. As for a 250-watt bulb, it’s weaker, so you might only need one to keep your plants happy. Again, it all depends on how many plants you’re raising. Below is a straightforward guide to help you find the right wattage for your HID grow light based on how many plants you’re working with, or the size of your grow space:
3 to 5 plants, or up to 4 square feet: 250 watts
6 to 9 plants, or up to 9 square feet: 400 watts
9 to 12 plants, or up to 16 square feet: 600 watts
12 to 16 or more plants, or 25+ square feet: 1000 watts
When setting up and adjusting your HID grow lights in your indoor setup, there is one main thing to consider: distance from your marijuana plants. You can never perform too many “hand tests” to ensure that it is not too close to your plants, as it may then cause them to burn (and will therefore negatively affect your yield). In order to check this, simply hold your hand underneath the lights for ten seconds near where the tops of your marijuana plants are. If you can stand the heat, this is too hot for your plants and you should move the grow lights up, further away from them. The following distances will be useful when you are initially estimating what the distance should be:
150W: 5-11 inches
250W: 6-13 inches
400W :8-19 inches
600W :9-25 inches
1000W: 11-31 inches
Double Ended Vs. Single Ended Bulbs
Something else you’ll run into while shopping for HID grow lights are double-ended and single-ended bulbs. The better bulb for you firstly depends on how much you have to spend. Single-ended bulbs are about half the cost of double-ended bulbs. But double-ended bulbs last longer. An additional 10,000 hours, to be exact. Double ended bulbs are also more efficient because they produce more PAR (usable light) for your plants using the same wattage.
Whether you should choose a double-ended or single-ended bulb also depends on your reflector. Some reflectors are compatible with double-ended bulbs, but some aren’t. If you have a wing, umbrella, air-cooled tub, air-cooled hood, or air-cooled tube hood reflector, then you need single-ended bulbs. But if you have a double-ended wing, double-ended air-cooled hood, double-ended large open hood, or a double-ended hood with an attached ballast reflector, double-ended bulbs are the ones for you.
Double-ended bulbs are 25-30% more efficient than single ended bulbs, meaning they produce higher PAR ratings for the same wattage. They also last longer, retaining 90% of their output after 10,000 hours of use. So why doesn't everyone use double-ended bulbs? They're more expensive for one. The bulbs generally cost up to 50% more and the reflectors cost up to twice as much. They also produce more heat. Finally, reflector options are more limited, with only a few styles available for double-ended bulbs. If you have the budget and the ability to eliminate the excess heat, go with double-ended bulbs, as the increased efficiency and longer life will make up for the increase in cost after a few grows. If you're not sure you can deal with the heat or you just don't have the budget, go with single-ended bulbs for now, especially if your grow area is on the smaller side.
What Reflector Style Is Best?
With so many different styles of reflectors, choosing one can be a daunting task. But the truth is, most reflectors will do a good job and the differences in light coverage and intensity are not really that large.
Example: A large reflector has a large coverage area, but the light is less intense. This means you need to hang it closer to the plants if you want more intense light, which reduces the coverage area. Thus, the large reflector ends up having a similar coverage and intensity as a smaller reflector hanging further away.
So why are there so many different types of reflectors? Each one specializes in a certain situation. The key is finding the reflector best suited for your grow space.
Air-cooled reflectors
Air-cooled reflectors are sealed off with glass and have vents through which you duct air to remove the heat before it gets a chance to enter your grow room.
Air-cooled reflectors are great for smaller grows, especially those in an enclosed space like a grow tent. They allow you to remove the heat directly from the reflector, without it escaping into the grow space. This is extra beneficial if you use supplemental CO2.
They are not very efficient in a larger space, though. The glass reduces the light output by 5-7% and it also removes come of the UV-A and UV-B light. Additionally, heat from the ducting will escape into your grow room if you have a lot of it.
Due to the above-mentioned inefficiencies, we only recommend air-cooled reflectors if you are growing in a grow tent or similar enclosed space.
If you have a large grow area with more than 10 lights, don't use air-cooled reflectors.
Think about it: how many photos have you seen of large grow operations with ducting running through them? Probably none, right? Instead, use open reflectors and ventilate the room as a whole. It is much more efficient for large grows.
Single-Ended Reflectors
Single Ended Wing Reflectors
Pros
cheapest reflector available
good coverage
intense light with great canopy penetration
Cons
reflector only on the sides of the bulb, not the ends: results in loss of light on either end of reflector not air-cooled (only a con for small, enclosed grow spaces)
Best for
Growers on a budget with a well-ventilated grow space.
Air Cooled Tube Reflectors
Pros
small size
the cheapest air-cooled reflector
Cons
small reflector means large loss of light
small coverage area
Best for
Growers on a budget, who are lighting a small, enclosed space. More so if they use supplemental CO2.
Air Cooled Hood Reflectors
Pros
large coverage area
intense light with deep penetration
Cons
most expensive reflector
Best for
Smaller grow spaces, especially enclosed and using supplemental CO2. This is the reflector we recommend for most home indoor growers.
Double-Ended Reflectors
Double-Ended Wing Reflectors
Pros
the cheapest double-ended reflector
pretty large coverage
good canopy penetration
Cons
reflector only on the sides of the bulb, not the ends: results in loss of light on either end of reflector not air-cooled (only a con for small, enclosed grow spaces)
Best for
Growers on a budget with a well-ventilated grow space.
Double Ended Air Cooled Hood Reflectors
Pros
large coverage area
intense light with deep penetration
Cons
most expensive reflector
Best for
Smaller grow spaces, especially enclosed and using supplemental CO2. This is the double-ended reflector we recommend for most home indoor growers.
Double Ended Large Open Hood Reflectors
Pros
very large coverage area
Cons
low intensity and penetration
a bit on the expensive side
not air-cooled (only a con for small, enclosed grow spaces)
Best for
Growers trying to light a large grow area with a small number of lights. Best used with powerful bulbs (600 or 1000 watt), to get sufficient intensity with such a large coverage area.
About ballast
No matter which of the two HID lights you choose from, you are going to need a ballast. That being said, the smaller (150W or 250W) HID lights do usually come with a built-in ballast, so pay attention and proceed accordingly. When buying in concurrence with your lights, ballasts are simple to figure out. If you are going to buy a 400W or 600W light (recommended for beginners), then you simply need to purchase a 400W or 600W ballast. The 600W ballasts are supposed to be the most efficient ones, with the 1000W ballast coming in a close second. Although you probably wouldn’t need to buy one, it is worth mentioning that 150W ballasts are likely the least efficient when compared to their larger counterparts. The next decision you need to make is whether to buy a digital or magnetic ballast. Magnetic ballasts are trickier because they need to be paired with certain types of lights, while digital ballasts, though more expensive, will save you effort, efficiency, and money in the long run. Digital ballasts are highly recommended. The best type of ballast will be digital, dimmable, and versatile (works for both MH and HPS bulbs). The more expensive the ballast, the longer it will probably last, so don’t skimp on the price.
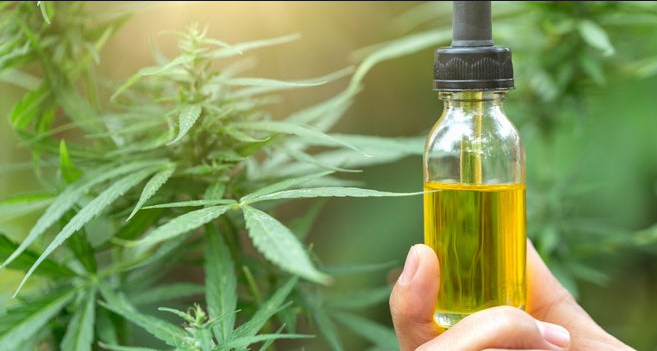
The cost of your HPS grow light
Figuring out how much running your grow lights will cost is a critical step for growers on a budget- or just about anyone, for that matter. Use the following information to accurately establish how much an HPS grow light will cost you to run. First of all, you will need to figure out how much your electricity costs per unit. You should be able to find this on any electricity bill you have received, marked as price per kilowatt hour (kW/h). This basically means that you are paying this much to use one kilowatt (1000 Watts) of electricity for one hour. Let’s say this unit price is 12 cents per kW/h. That means that, if you have a light that is 1000W, it costs exactly 12 cents per hour to use when it is turned on. A 600W bulb would use 60% of that price, which in this example is 7.2 cents while a 250W bulb would use just 25% of that price (3 cents per hour). Calculate the cost per hour for the bulbs that you have. Now take that number and multiply it by the number of hours you run the HPS per week. Don’t forget to also add in the wattage of the ballast. For example, if you have a 1000W bulb and a 100W ballast, that would be 1100 Watts per hour, which would cost 13.2 cents per hour for this example. If you have the lights running 24 hours a day (like during the vegetation stage), this means it will be $22.18 per week. Flowering (half of the day with lights on, half with lights off) would cost $11.09 per week. Once you have this information, you should be able to budget accurately. While HPS lights are certainly more expensive to run than other kinds of lights, the effectiveness and proven quality of these lights makes it well worth it for many growers nonetheless. If you are looking to cut energy waste and costs, however, you should consider LED lights instead.

What Is A Ceramic Metal Halide Grow Light?First, let’s clear up a point of confusion.
Ceramic Metal Halide (CMH), Light Emitting Ceramic (LEC) and Ceramic Discharge Metal Halide (CDM) all refer to the same thing.
CMH is the most common term.Another point of confusion concerns their relationship to metal halide lights.
However, unlike the Sunsystem has a ballast inside the reflector, Eco Farm ballast is placed externally.
But this is not a concern to me or lots of growers.Lots of users have used this fixture and enjoyed good results with it.
The light has a lifespan of 10,000 hours, which is much less than that of many other CMH lights.


Hid Headlights Solano.Get the best hid headlights in Napa.
Come to Audio House for all your car audio and video needs.
Buy automotive replacement lights, including headlights and bulbs from Audio House Napa.