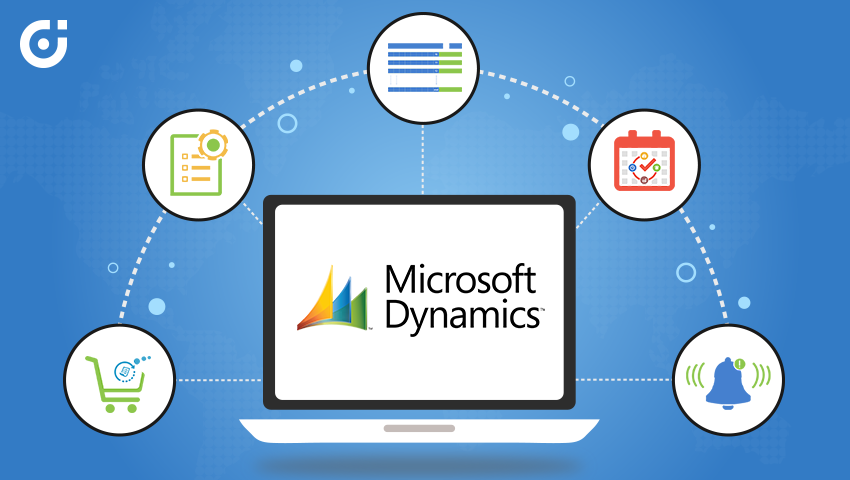
Dynamics 365 is a whole, next-generation CRM and ERP solution. Dynamical by Microsoft, the software apartment comes with many revive, containing professional features like the ability to build dynamic marketing lists.
With a devoted tool for this sector, Microsoft Dynamics 365 Marketing Partners provide a simpler, more professional greet to what is sometimes an untouchable part of the organizations. What’s more, 365 Marketing permits you to built and strengthen your clientele base, harmoniously manage your business’ sales and marketing, and modify your decisions thanks to artificial intelligence designed to normalize complex decisions.
This approach to growth is based on rational marketing management—a strategy that we’ll discuss below.
You can create two types of marketing lists:
-
Static Utilize a static list if you favor to add and update members manually.
-
Dynamic Use a dynamic marketing list if you want the list to return a list of members dynamically when needed, based on the search criteria you set. For example, if you want to run a campaign for members of a specific city, use a dynamic list.
Being able to create the right marketing lists in your Dynamics 365 solution is central to any organization looking to build highly targeted marketing campaigns. Here, we discussed how to create a Dynamic marketing list in Dynamics 365.
Built Dynamic Marketing Lists
Step 1: On the main Navigation Bar, choose the arrow located to the right of the Sales module.
Step 2: Choose 'Marketing' and then Choose 'Marketing Lists'.
Step 3: Select 'New' in the Command Bar.
Step 4: Select the appropriate 'Name' for your marketing list.
Step 5: Choose the 'Targeted At' option
Step 6: Choose 'Dynamic' in the Type field
Step 7: 'Save' the record.
Step 8: Choose 'Manage Members' in the main Command Bar.
Step 9: Choose the 'Add using Advanced Find' and then choose 'Continue'.
Step 10: Choose your query based on your search criteria, then select 'Find'.
Step 11: Select either 'Add only the selected members to the marketing list' and select who you want to add individually OR 'Add all the members returned by the search to the marketing list'.
Step 12: After you have made your decision you can select 'Add to Marketing List' which will save your selection to your marketing list
Step 13: Close the window. These records set out by your select search criteria will be automatically added to this list.


Alletec provides knowledgeable Microsoft Dynamics 365 Implementation Partners and development Services.
We offer the foremost efficient services to piece, customize and optimize the out-of-box Dynamics 365 CE and different applications.
we tend to specifically match your info, performance, and business method and support necessities.
we tend to conjointly offer Consulting consultants and dedicated Offshore development and support groups for Dynamics 365 and custom development comes.
Alletec could be a leading Microsoft Gold Partner providing you Dynamics 365 business processes on-premise and on a cloud answer.
Our team of consultants follows a strategic read making certain that Microsoft's business answer delivers superior results to our customers.

Work with a trusted Microsoft Dynamics 365 Sales Partners to get the most value from your Dynamics 365 Integration—whether you’re just getting to begin or looking to enhance present solutions.
Approach an Organization-leading Microsoft partner ecosystem that provides expert intelligence and support in buying, implementing, and optimizing your Dynamics 365 applications.
Features Included In Microsoft Dynamics 365 Sales Partners-Switch on digital sellingFocus on the right users, attract customers anywhere, and take rapid action using AI.Authorize sellers to create relationships remotelyStay focused on relationships using merge solutions and data across LinkedIn Sales Navigator, Dynamics 365 Sales, and Microsoft 365.Encourage sales productivity with harmonious toolsFree up much time for commitment using familiar and united tools and intelligent automation to streamline the sales procedure.Better coaching and sales performanceEfficiently coach sellers using data-driven feedback, produce a conclusion based on real-time data and emerging swing and drive income with pipeline analysis, deal insights, and relationship analyticsMaximize sales profitablyDecrease costs via sales and marketing alignment, and shorten sales cycles with a predictive view.Initiate with sales solutions built to evolveDrive digital change with flexible and measurable sales solutions that are simple to tailor, expand, and attach to other applications and services you already use.Here I am going to describe some advantage of Microsoft Dynamics 365 Sales Partners-Microsoft Dynamics 365 Sales Partners can be used to handle your customer relationships and sales activities or personalize the system to manage any kind of team- member relationship.Integrated, Flexible, and ScalableStart with Dynamics 365 Sales, then include more Dynamics 365 applications as you grow.Dynamics 365 Field ServiceDynamics 365 Customer ServiceDynamics 365 MarketingDynamics 365 Project Service AutomationDynamics 365 Business CentralDrive More OrganizationsDynamics 365 Sales is designed to help your sales and customer management teams achieve more and more.Handle your customers and accounts by tracking every email, meeting, and phone call.Streamline lead management and recognize cross-selling chances by tracking all of your leads in one centralized system.Analyze individual, group, and company sales performance.
Forecast revenue and identify the gaps in your pipeline.Completely Configurable to Your OrganizationsEngage Encore to personalize Dynamics 365 Sales to your requirements:Implant your sales procedure into Dynamics 365 Sales.An implant that you are capturing all of the data points you require to work effectively.Implement Dynamics 365 Sales with your existing systems.Expand and EmbedWe can completely integrate Dynamics 365 Sales with Office 365.
You can also utilize your Dynamics 365 data in other applications.Cooperate on deals with implementations to Microsoft Teams, OneNote, SharePoint, and more.Analyze performance and Key Performance Indicators in Power BI.Create automation across all of your organization apps with Microsoft Power Automate.

Assembling ERP frameworks enable the majority of the areas of a generation firm to work together in a planned manner, sans every single outside interface.
Previously, when there were human applications that directed for individual techniques, there were threats of cross stage similarity, which is right now precluded.
Moreover, the joint variation of ERP for assembling industry return incorporated work process techniques which are created to amplify the use of instruments, to diminish the whole cost of the entire assembling procedure and furthermore to control the whole item improvement stages - procurement of crude materials , quality, consistence, generation, promoting, income and money related remuneration.
ERP framework for assembling can be tweaked dependent on the requests of your organization.
This is the reason the framework can adapt up to the business techniques beginning from creating up to invoicing and handles quality control, bundling, detailing and statement.
In this manner, fabricating ERP frameworks certification improved profitability, diminished expenses and upgraded client benefits in an organization.


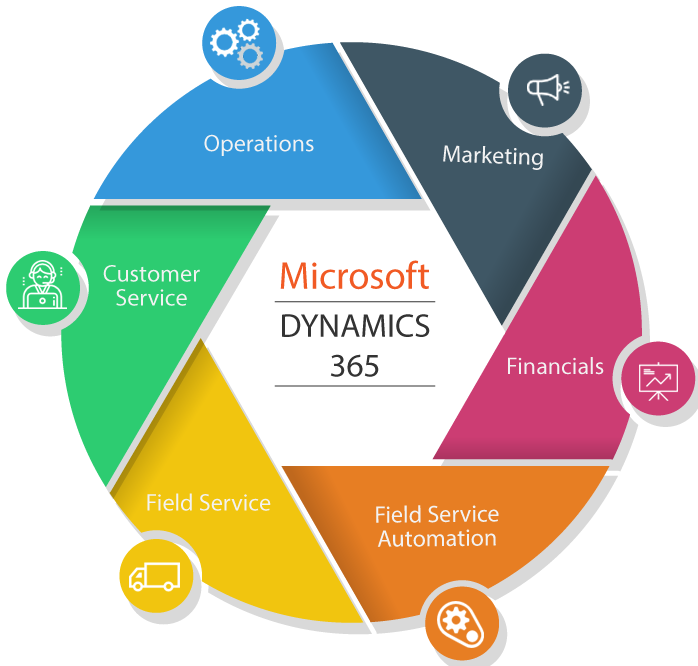
What is Microsoft Dynamics 365?Microsoft Dynamics 365 is a cloud-based business applications platform that combines components of customer relationship management (CRM) and enterprise resource planning (ERP), along with productivity applications and artificial intelligence tools.Dynamics 365 applications work seamlessly together for a comprehensive solution that runs your entire business—including sales, marketing, service, operations, and commerce.
You’ll get a 360-degree view of your organisation to uncover the real-time insights that bring better results.Microsoft Dynamics for Sales:Microsoft Dynamics CRM is our customer relationship management (CRM) business solution that drives sales productivity and marketing effectiveness through social insights, business intelligence, and campaign management in the cloud, on-premises, or with a hybrid combination.Customer relationship management (CRM) can help reduce costs and increase profitability by organizing and automating business processes that nurture customer satisfaction and loyalty in the sales, marketing, and customer service fields.
CRM solutions can deliver ROI through marketing automation, customer service, and sales force automation.We also offer mobile CRM apps and platforms that enable you to manage your customer relationships on your mobile devices, along with tools that integrate data and reporting from social media directly into your CRM application.With Microsoft Dynamics CRM, you get powerful CRM software delivered on cloud, hosted or on-premises.
Our CRM Online service provides instant-on anywhere access, predictable pay-as-you-go pricing, and a financially backed service level agreement.Benefits of using Dynamics 365 for Sales:Import Data EasilyConvenienceSuper-easy integrationStage trackingTrack your competitorsOnce you have made up your mind to migrate to Dynamics 365 for sales, next comes the task of successful migration approaches.
Well, there are many approaches to migrate to Dynamics 365, but it's highly recommended to take the assistance of Microsoft Dynamics 365 Sales Partners.Microsoft Dynamics 365 Sales Partners provides intelligence on prospective customers, personalization and customer engagement, sales productivity and performance metrics.It supports automation of sales from lead acquisition to close of sales.