


Troubleshooting Common Problems with Vivotek Cameras: A Step-by-Step Guide
Vivotek is a well-known brand when it comes to surveillance cameras. It has gained popularity for its wide range of products, high-quality video footage, and easy-to-use features. However, despite the exceptional performance of Vivotek cameras, they are not entirely immune to issues that may arise from time to time.
In this article, we will discuss some of the common problems encountered while using Vivotek cameras and how to troubleshoot them. Whether you are an installer or an end-user, this step-by-step guide will help you to resolve issues experienced in using your Vivotek cameras.
Problem: Unable to Access Camera Via Browser
If you are unable to access your Vivotek camera via a web browser, there may be several reasons for the issue;
- The network connection to your camera is down
- The camera has a different IP address from the one you are trying to access
- Your computer's IP address is on a different subnet from the camera's
To resolve this problem, follow these steps;
- Check that your camera's network cable is properly connected, and it's getting a stable power supply.
- Check the IP address of the camera, and ensure that you are typing the correct address into the browser's address bar. You can find the IP address of your camera by using Vivotek's software or through the router's configuration page.
- If the camera's IP address is on a different subnet, you will need to change your computer's IP address to the same subnet. To do this, go to Control Panel > Network and Sharing Center > Change adapter settings. Right-click on your Local Area Connection, and select Properties. In the Properties window, select Internet Protocol Version 4 (TCP/IPv4), and click on Properties. Select 'Use the following IP address' and enter the correct IP address, subnet mask, and default gateway.
Problem: Poor Image Quality or No Image
Poor image quality or no image at all can be caused by several factors, including;
- Inadequate lighting conditions
- Loose or damaged cables
- Wrong camera settings
To resolve this issue, follow these steps;
- Check the lighting conditions in the area where the camera is installed. If the area is too dark, consider adding lighting to the area to improve image quality.
- Check the network cable connection to the camera. Ensure that the cable is not loose or damaged, and it's connected correctly to the camera and network device.
- Check the camera settings, and make sure it's set to the appropriate settings. Adjust the brightness, contrast, and exposure according to the lighting conditions in the area.
Problem: Camera Freezes or Stops Working
If your Vivotek camera freezes or stops working, it could be due to several reasons, including;
- Inadequate power supply
- Outdated firmware
- Overheating
- Network issues
To resolve this issue, follow these steps;
- Ensure that the camera is receiving a stable power supply. Make sure the power cable is connected correctly, and it's getting enough voltage to power the camera.
- Check for firmware updates. Vivotek regularly releases firmware updates to fix bugs and improve the camera's performance. You can download the latest firmware update from Vivotek's website and update the camera using Vivotek's software.
- Check the temperature near the camera. If the camera is overheating, consider moving it to a cooler location or adding an external fan to reduce the temperature.
- Check the network connection. If the camera is not communicating with the network device correctly, you may need to check your network settings or contact your network administrator for assistance.
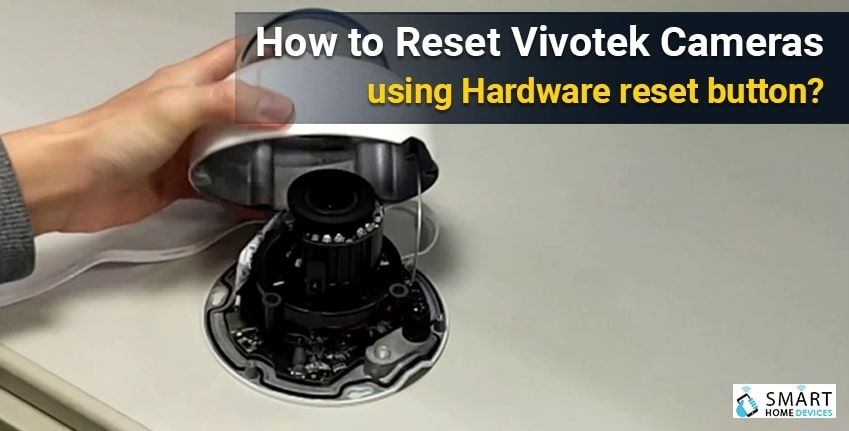
Problem: Forgot Camera Password
If you have forgotten your Vivotek camera password, you can reset the password using the following steps;
- Hit the reset button on the camera for at least 5 seconds. The reset button is usually located on the back of the camera or on the side of the camera.
- The camera will then reboot and restore its settings to their original state.
- Access the camera using Vivotek's software or via a web browser, and change the password to a new one that you can remember.
Problem: Camera Image Is Flipped or Inverted
If the camera's image is flipped or inverted, it could be due to installation in an upside-down position or incorrect settings;
To resolve this issue, follow these steps;
- If the camera is installed upside down, go to the camera settings, and change the image rotation settings to 180 degrees to flip the image to the correct orientation.
- If the image is inverted and the camera is correctly installed, go to the camera settings, and change the image rotation settings to 0 degrees.
Problem: Camera Recording Time Is Too Short
If the camera's recording time is too short, it may be due to a lack of storage space or incorrect settings.
To resolve this issue, follow these steps;
- Check the storage capacity of your NVR or storage device. If it's full, you may need to remove old recordings or increase the storage capacity.
- Check the camera's recording settings and adjust the recording time accordingly.
Conclusion
Vivotek is a reliable brand, and its cameras are known for their high-quality performance. However, like all electronic devices, Vivotek cameras may sometimes experience issues that require troubleshooting. By following the step-by-step guide outlined above, you can quickly troubleshoot and resolve any issues encountered while using Vivotek cameras. Remember, if you're having trouble resolving an issue, reach out to the manufacturer for assistance.


This mobile phone Pop-up dual front camera phone comes from a very powerful mobile phone manufacturer in China. The company is about to launch its first smartphone with a pop-up dual camera with a full-screen design. This will be the latest Pop-up camera phone after VIVO NEX model and OPPO Find X.
The Vivo NEX and the OPPO Find X have a retractable camera system with the same mechanism: a stepper motor and a worm to get out and retract the module. On the OPPO Find X, the mechanism lifts a module making the entire width of the smartphone while on the Vivo NEX, it is a module of about 1 cm² with only a front camera. In the same idea, This Company has announced work on the EP2007 which includes a retractable camera system as on the Vivo NEX, but this time with two sensors.
With the dual sensor-packing pop-up camera, the device will not have a cut-out on its display (notch) and the screen ratio would be exceptional. The phone's aspect ratio looks like what will supersede any other device of the same level. The screen-to-body ratio is said to reach up to 95%.
The EP2007 model comes with a spectacular camera arrangement which is a dual selfie setup with a pop-up design. This is very much similar to that of the VIVO NEX but in this case, the pop-up camera module is wider as it houses two sensors.
It comes with a full-screen design with an ultra-slim top and side bezels. The pop-up design became necessary as a result of the thin bezel at the top. In other words, there is no notch at the top which will house the selfie cameras. The dual selfie camera pops up in just a matter of seconds when the camera app is launched and retracts when you exit the app.
Apart from the camera, the phone comes with a screen ratio that is up to 95%. That is because there is only a noticeable bezel at the chin. The frame is also said to be slimmer than previous models. The company has confirmed that the device would come with a topnotch hardware configuration, powerful processor, and a large storage capacity. The device would also pack mainstream technologies such as on-screen fingerprint recognition and wireless charging.
It is reported that the model has accepted the OEM reservation, and also accepts ODM customization, and modifies the hardware configuration according to customer requirements.
You can visit official website to learn more:

Photography is anything but a simple task. Getting good results is part composure, part experience, and part hardware. The mobile phone space has been blowing up over the past few years with fewer and fewer people buying dedicated point and shoot cameras and instead relying on their smartphone.
