


![How to Use the Cricut Explore Air 2 [Beginner's Guide]](https://d1tlrxy0mfxnyo.cloudfront.net/thumbnail/544918/8b67ae09-1834-a2d9-bdc8-518f64d18d7d.jpg?width=649)
If you've purchased a new Cricut Explore Air 2 or are planning to purchase one, you must be wondering how to use it. If this is your very first Cricut machine, then it is understandable that you are a little confused about operating it. To help you out, we will walk you through the entire process, from unboxing to creating your first design. Don't skip any apart; you may miss something important. Let's begin.
Visit- Cricut.com/setup
What Comes With the Machine?
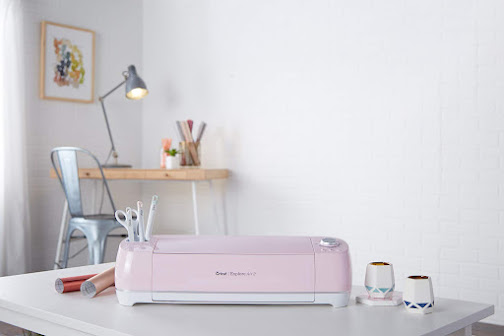
In the box, along with the machine, you will get an instruction manual, a Cricut mat, a cutting blade, a silver pen, an accessory adapter, cardstock, vinyl samples, power, and USB cords. Ensure that nothing is missing. If anything isn't included, you either return your product to the store or contact Cricut Customer Care for a speedy replacement. If you find anything extra, then good for you. The Cricut Explore Air 2 comes in three colors: sky blue, pastel pink, and mint green. If you have ordered it online, ensure you have received the right color.
What’s Inside the Machine?
Its layout resembles the original Explore Air but boasts a mint finish. Cricut Explore Air 2 features a tool cup, accessory clamp A, blade clamp B, accessory storage compartments, a smart set dial, and a cutting mat. If you ever need to replace the blade, open the lever and pull out the metal housing. There's a tiny plunger on the top, and the blade sits on the inside. Press down on the plunger to reveal the blade, which is magnetically held out. Pull the blade out and drop another one in.
How to Connect Explore Air 2 With Smart Devices?
Cricut Explore Air 2 can be used wirelessly with your computer, mobile, or tablet. We will start by setting the machine via the USB cable to make things easier for you. Setting up a Cricut and connecting Explore Air 2 to your computer via a USB cable is very simple and will take a few minutes. So without any delay, let's begin:
● Plug the machine in, and connect it to your computer via a USB cable.
● Turn on your machine and computer.
● Open the Cricut website and register a user account.
● Download the most recent plugin software.
● Run the installer and visit design.cricut.com.
● Tap the menu icon in the top left corner of your screen and choose New Machine Setup. You will be guided through the installation process and to your first project.
How to Use Explore Air 2 for First Cut?
Let's begin with the main task; for your convenience, let's try something simple that you can make with the materials that come with your machine. Before starting the craft-making process, keep a few items near you, including paper, cardstock, a silver pen, and a cutting mat. If the cutting mat still has the protective film, remove it and set it aside.
Cut Your Design
● On your computer, you should see a design placed on the screen if you had selected "New Machine Setup" earlier.
● If you don't see the design, then visit the official website.
● Click the Menu icon at the top left corner and choose New Machine Setup.
● Load the grey cardstock onto the cutting mat with the textured side facing up.
● Line the cardstock vertically on the mat. It should be properly aligned in the top left corner.
● Insert the mat inline into the Cricut Explore Air 2. While pressing the "load/unload" button on the top right of the machine, keep the mat pressing firmly against the rollers.
● Open the accessory clamp A. Take off the pen cap, and insert the silver pen tip-down into the housing. Keep it there until the arrow on the pen disappears, then close the clamp.
● Check the design on the mat preview screen; press Go when everything appears fine.
● Set the dial on Cricut Explore Air 2 to cardstock.
● The "C" button will continuously flash. Press it to start the machine and let the machine do its job.
Finish the Process
● Once the project is finished, press the load/unload button. Remove the pen and place it in the handy bin present on the left side of the machine.
● Unload the mat and place it face down on a clean surface. Curl the edge of the mat up toward you. The material will peel away from the mat, and as you pull it off, keep curling the mat up.
● Fold the card in half and crease it. The same goes for blue paper and palace it inside the grey card. If you want, you can glue them together. And voila, your end product should look like this.
Frequently Asked Questions (FAQs)
What is Cricut Access?
Cricut Access is Cricut's premium subscription service. Depending on your chosen plan, you will be granted unlimited access to your fonts and designs temporarily. You may even get a 10% discount on all Cricut purchases. If you plan to buy many items in the Cricut Design Space store, then Cricut Access is worth investing in.
What are the Cricut Explore Air 2 essential accessories?
Here is a list of the Cricut Explore Air 2 essential accessories:
● The cutting mat: Light grip, Standard grip, & Strong grip.
● Cricut Tools Craft Basic Set includes Scissors, Tweezers, a Scraper, Spatula, & Weeder.
Is the Cricut mat the same as transfer tape?
No, the Cricut mat is completely different from the transfer tape. Cricut mat places your material while it's in the cutting machine. Transfer tape transfers a vinyl design and applies it to another surface. The mat is used while it's being passed through the machine.
Source url:- https://palkersmith.blogspot.com/2023/04/how-to-use-cricut-explore-air-2.html


