


Do you want to learn how to use vinyl on Cricut? It’s good to start learning something new. And I can walk you through all the steps included in using vinyl on your Cricut. With vinyl, you can create a beautiful project with your Cricut machine anytime.
I’m a Cricut enthusiast and work full-time to make the best pieces of craft. As much as I have used Cricut, I have closely observed how it works. With this guide, I want to share my learnings with all my readers who are interested in crafting and want to create something.
Do you know what vinyl is? These are flexible materials that are used to transfer designs onto your materials. You can use them to create personalized projects. Let’s get started with this blog post to learn the procedure closely.
What Tools and Supplies Do You Need?
Before you get started with the guide, you’ll have to gather up some necessary materials. Once you’re ready with these materials, you can start with a further guide to create a beautiful craft. Let’s see the list of materials here.
● Cricut machine
● Weeding tool
● Brayer
● Cricut StandardGrip mat
● Scraper
● Transfer tape
● Adhesive vinyl
Finally, you can start with the process and create the best piece of craft with your one and only Cricut machine.
How to Use Vinyl on Cricut to Make a Personalized Craft?
In this section, I’ll tell you some basic steps to get started. Once you have learned the steps clearly, you can experiment with your material and make a similar one. So, without further delay, let’s jump to the final process and learn how to use vinyl on Cricut for beginners.
Step 1: Create a Design in Cricut Design Space
To start, you’ll need to launch your Cricut Design Space software and hit the New Project option. Now, you’ll need to add an image or a text that you want as a final outcome. As Design Space offers you a huge library of images and pre-made designs, it’s quite easy to design anything. Also, you can upload an external file to Canvas.
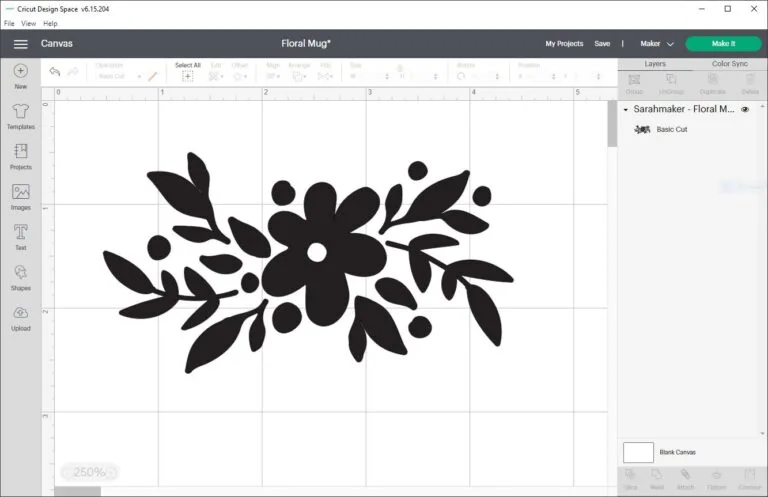
You can explore all the features of the Design Space. Once you’re satisfied with the design, hit the green “Continue” button.
Step 2: Load Your Vinyl on the Cricut Mat
In this step, you need to place the Cricut StandardGrip mat on a clean, flat surface. Also, take off the plastic covers from the sheet. Now, load the vinyl on your mat, aligning the vinyl with the Cricut mat’s grid lines. Once the vinyl is fixed in place, smooth it down with a scraper tool.
This step will remove all the air bubbles between your Cricut mat and the vinyl.
Moving forward, load your mat into the Cricut machine. Plus, align the edges of your mat with the grid lines. Finally, hit the Load button to load your mat into the machine.
Step 3: Select the Material
I hope you’re learning how to use vinyl on Cricut well with this guide. Moving forward with the next step, choose a material to be cut. For instance, which type of material vinyl you are using - Temporary, permanent or anything else.
To do this, continue with the on-screen prompts to select the Base Material. After that, select the vinyl settings from the options. In case you don’t see your material on the list, hit Browse All Materials to check out the full list.
After selecting the right material, just hit the Go button to start the cutting process.
Step 4: Weed Out Excess Vinyl
Once you get your cut vinyl, it’s time to hit the Load button to unload your Cricut mat. Now, you’ll get the vinyl in the shape you wanted. Remove the excess of vinyl from it using a weeding tool. This tool will remove all the tiny leftovers gracefully leaving the original design untouched.

This method is crucial to give a good finishing to your final project. Once you’re ready with the further steps. Let’s check all of them.
Step 5: Prepare Your Blank
You’ve come here after a long way. So, now you need to prepare the surface of your project with a rubbing alcohol and cotton. This step removes all the dirt, dust and lint from the surface leaving a smooth surface for final vinyl transfer.

Here, I’m using a mug. Let’s wipe it with alcohol and cotton. Let it dry, and continue with the vinyl transfer.
Step 6: Apply Transfer Tape to Your Vinyl
In this step, cut a transfer tape slightly larger than your vinyl design. Next, peel off the paper backing from the transfer tape. Then, apply the transfer tape on your vinyl design in alignment with the grid lines to keep the design straight.
After that, burnish the transfer tape on your vinyl using a scraper tool. This step will help you transfer your vinyl design smoothly.
Step 7: Peel off the Transfer Tape
In this step, carefully peel off the transfer tape from your vinyl’s backing. Ensure that the transfer tape is lifting away smoothly from the backing paper. If it doesn’t happen, you may need to burnish the transfer tape once again.
Step 8: Apply Your Vinyl Design to the Final Project
It’s the final step for transferring your vinyl to the final project. Check if your design is aligned properly on your transfer tape. Once the design is in the correct position, press the vinyl to stick it to the final project. Also, you can use a scraper to burnish the design. Apply the scraper tool all over the vinyl design.
Step 9: Take off Your Transfer Tape
You know how to use vinyl on Cricut. Now, in the final step, just gently peel off the transfer tape away from your project. Ensure that you pull it away at an angle of 45 degrees. Then, the transfer tape will be removed, and the design will be left.

After that, your personalized project is over. Moreover, you need to wait for 24 hours before washing it.
FAQs
How to Place Permanent Vinyl on a Cricut Mat?
Check out the steps below to place a permanent vinyl on your cutting mat:
- Getting started with placing the vinyl on a Cricut StandardGrip mat.
- Design your project on Cricut Design Space and load it into the machine.
- Hit the Go button and finish the vinyl loading.
What Kinds of Vinyl Are Available for Cricut?
There are mainly two types of vinyl- Adhesive and Heat Transfer Vinyl. The adhesive vinyl comes for standard projects that only need transfer of vinyl to the project’s surface. On the other hand, a heat transfer vinyl is suitable for the iron-on projects that demands application of heat to transfer design.
Which Vinyl Should I Use for My Cricut Projects?
Well, it completely depends on the type of your project. If you need a temporary project, you should use removable vinyl that can be removed when you don’t need it anymore. On the other hand, if you want a more professional-looking and high-quality project, you should go with a permanent vinyl type.
Read more: install cricut design space app
Source: how to use vinyl on Cricut


